Measuring runs with lines and polylines
Just need to check a distance? You don't have to draw anything: at any time, pick the Measure tool (or press
D), click two points, and read the distance; nothing is added to your takeoff. See Quick one-off distances at the bottom of this guide.
Try it: the Measuring lesson opens sample sheets in the app and walks this with you, two or three minutes, checking each step against what you actually did.
Once the scale is set, CountTooling can turn any line you draw into a real-world length. That's your linear takeoff: pipe, conduit, trim, anything that runs. On a sheet with no scale yet, these tools pause and show a "Set Scale first" toast; its Set Scale link opens the scale dialog right there.
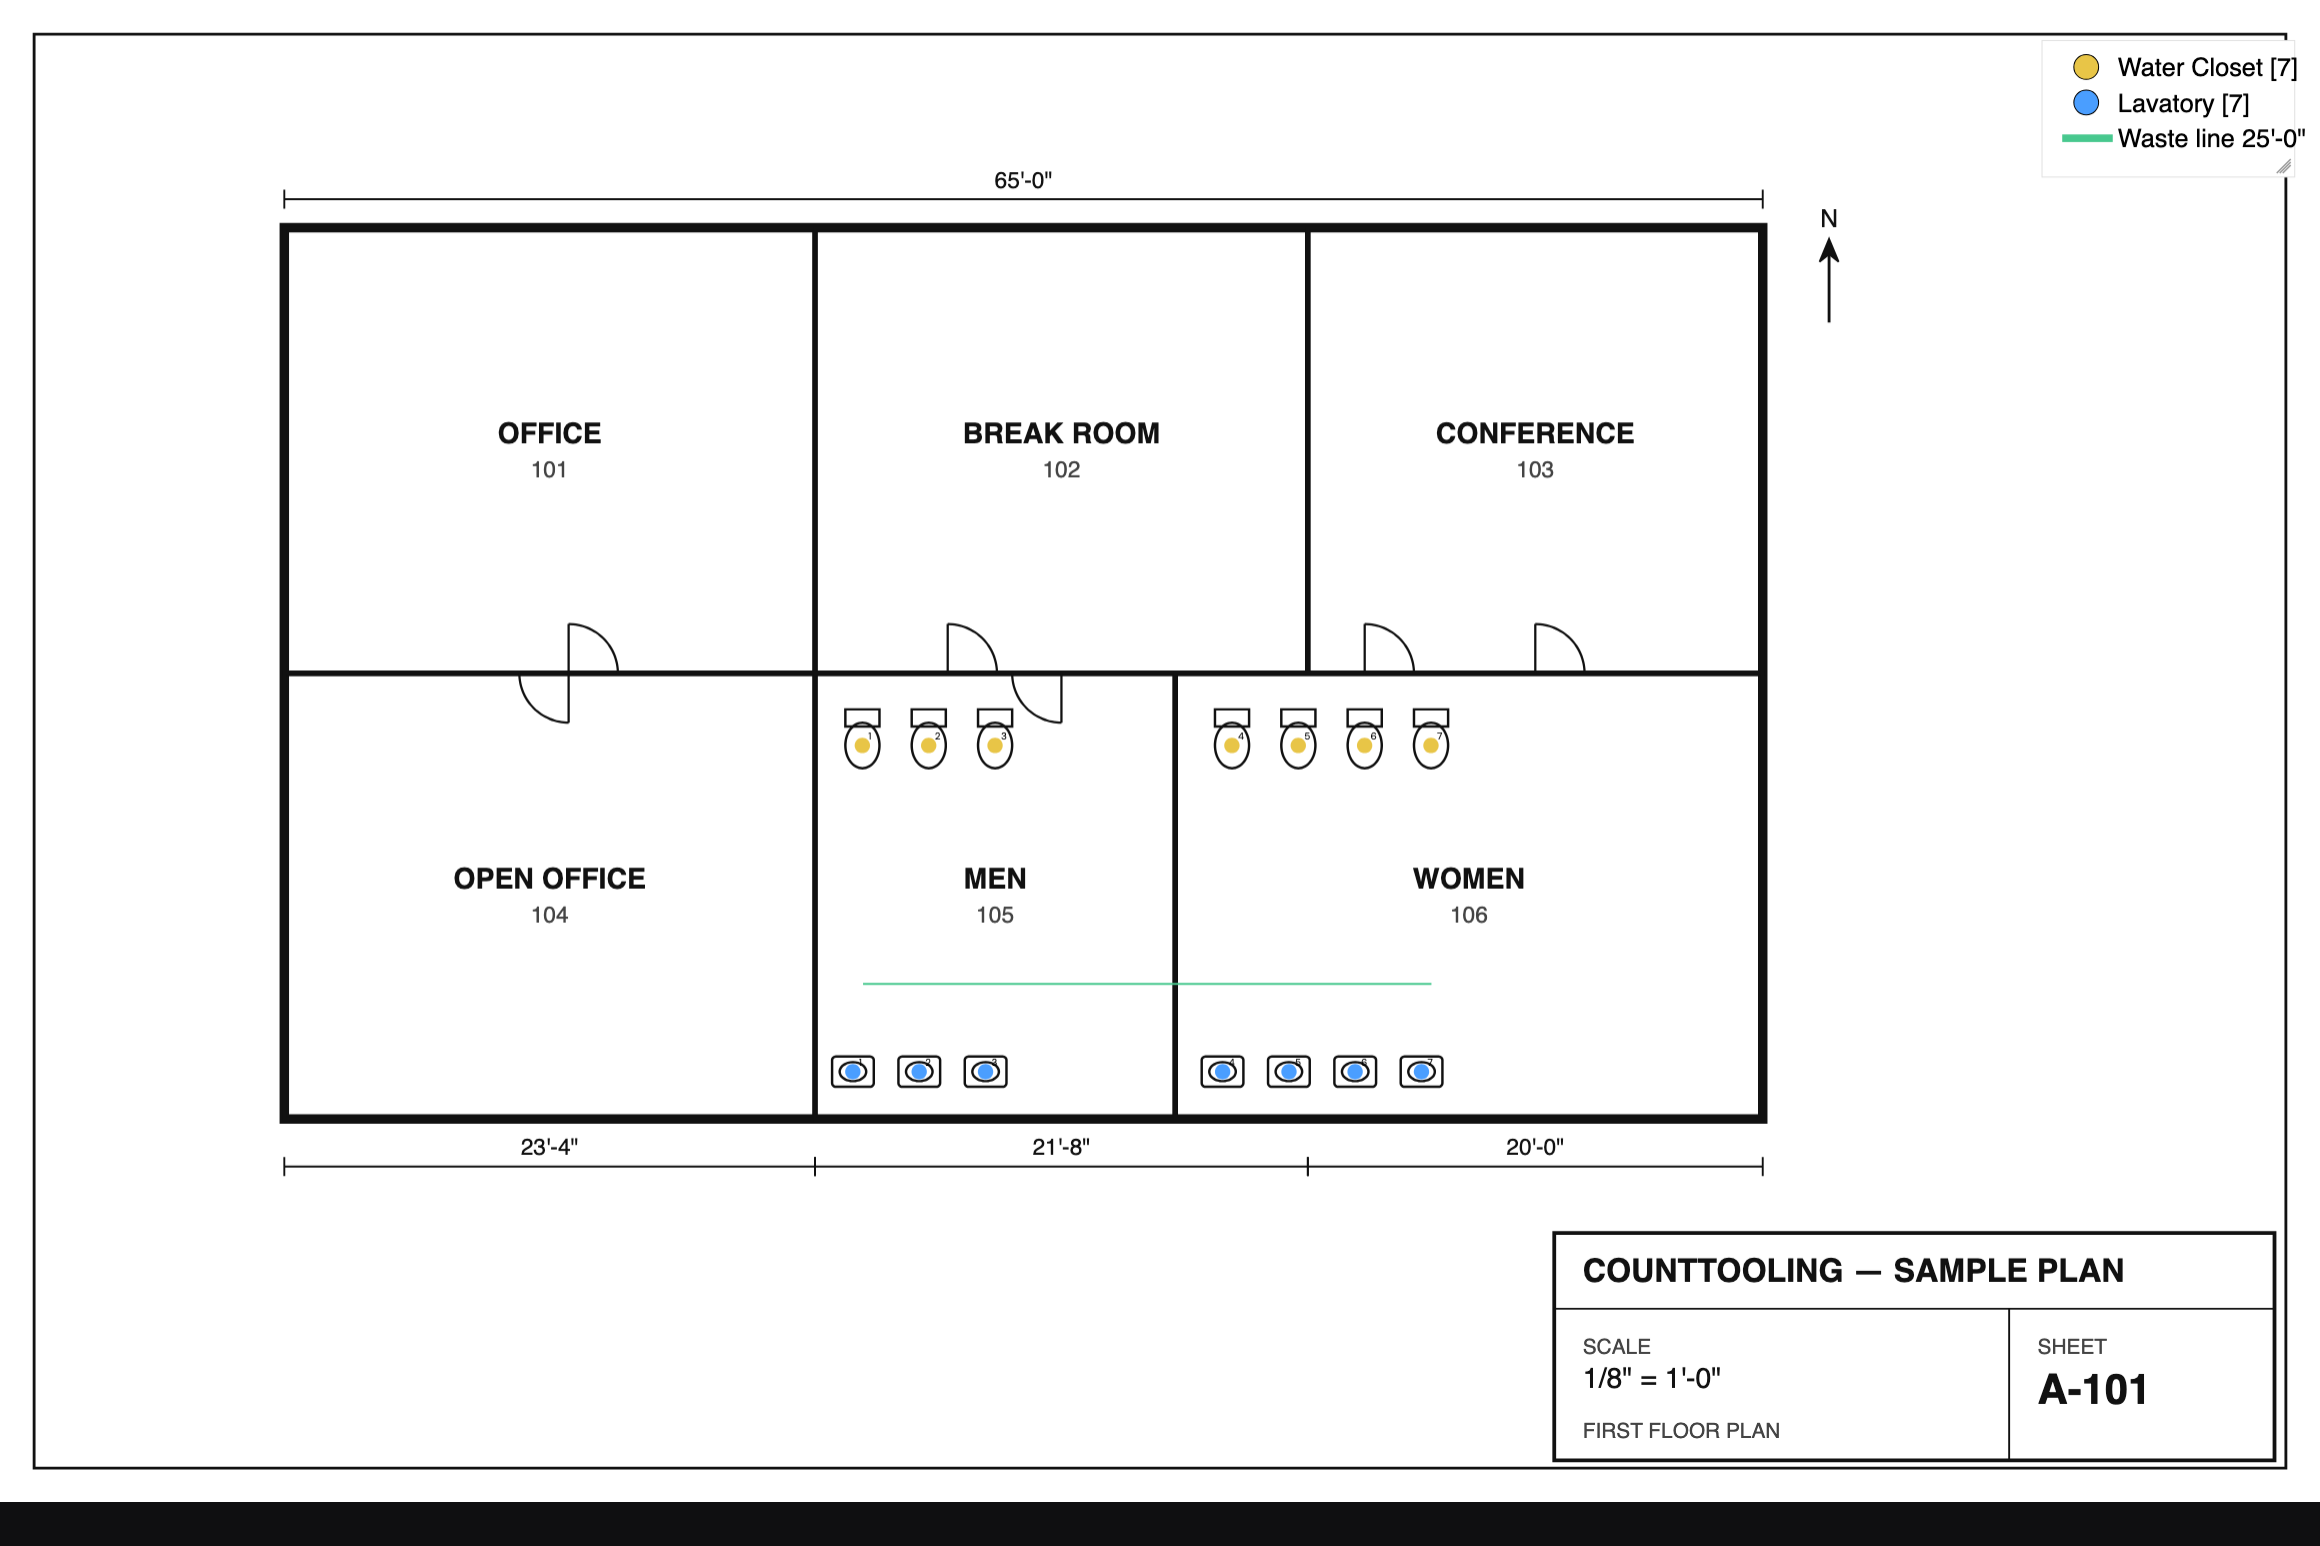
Every run belongs to a line type, a named template with a color and a straight-or-curved style. Make one for each kind of run you're measuring (waste, vent, conduit) so the totals break down by type.
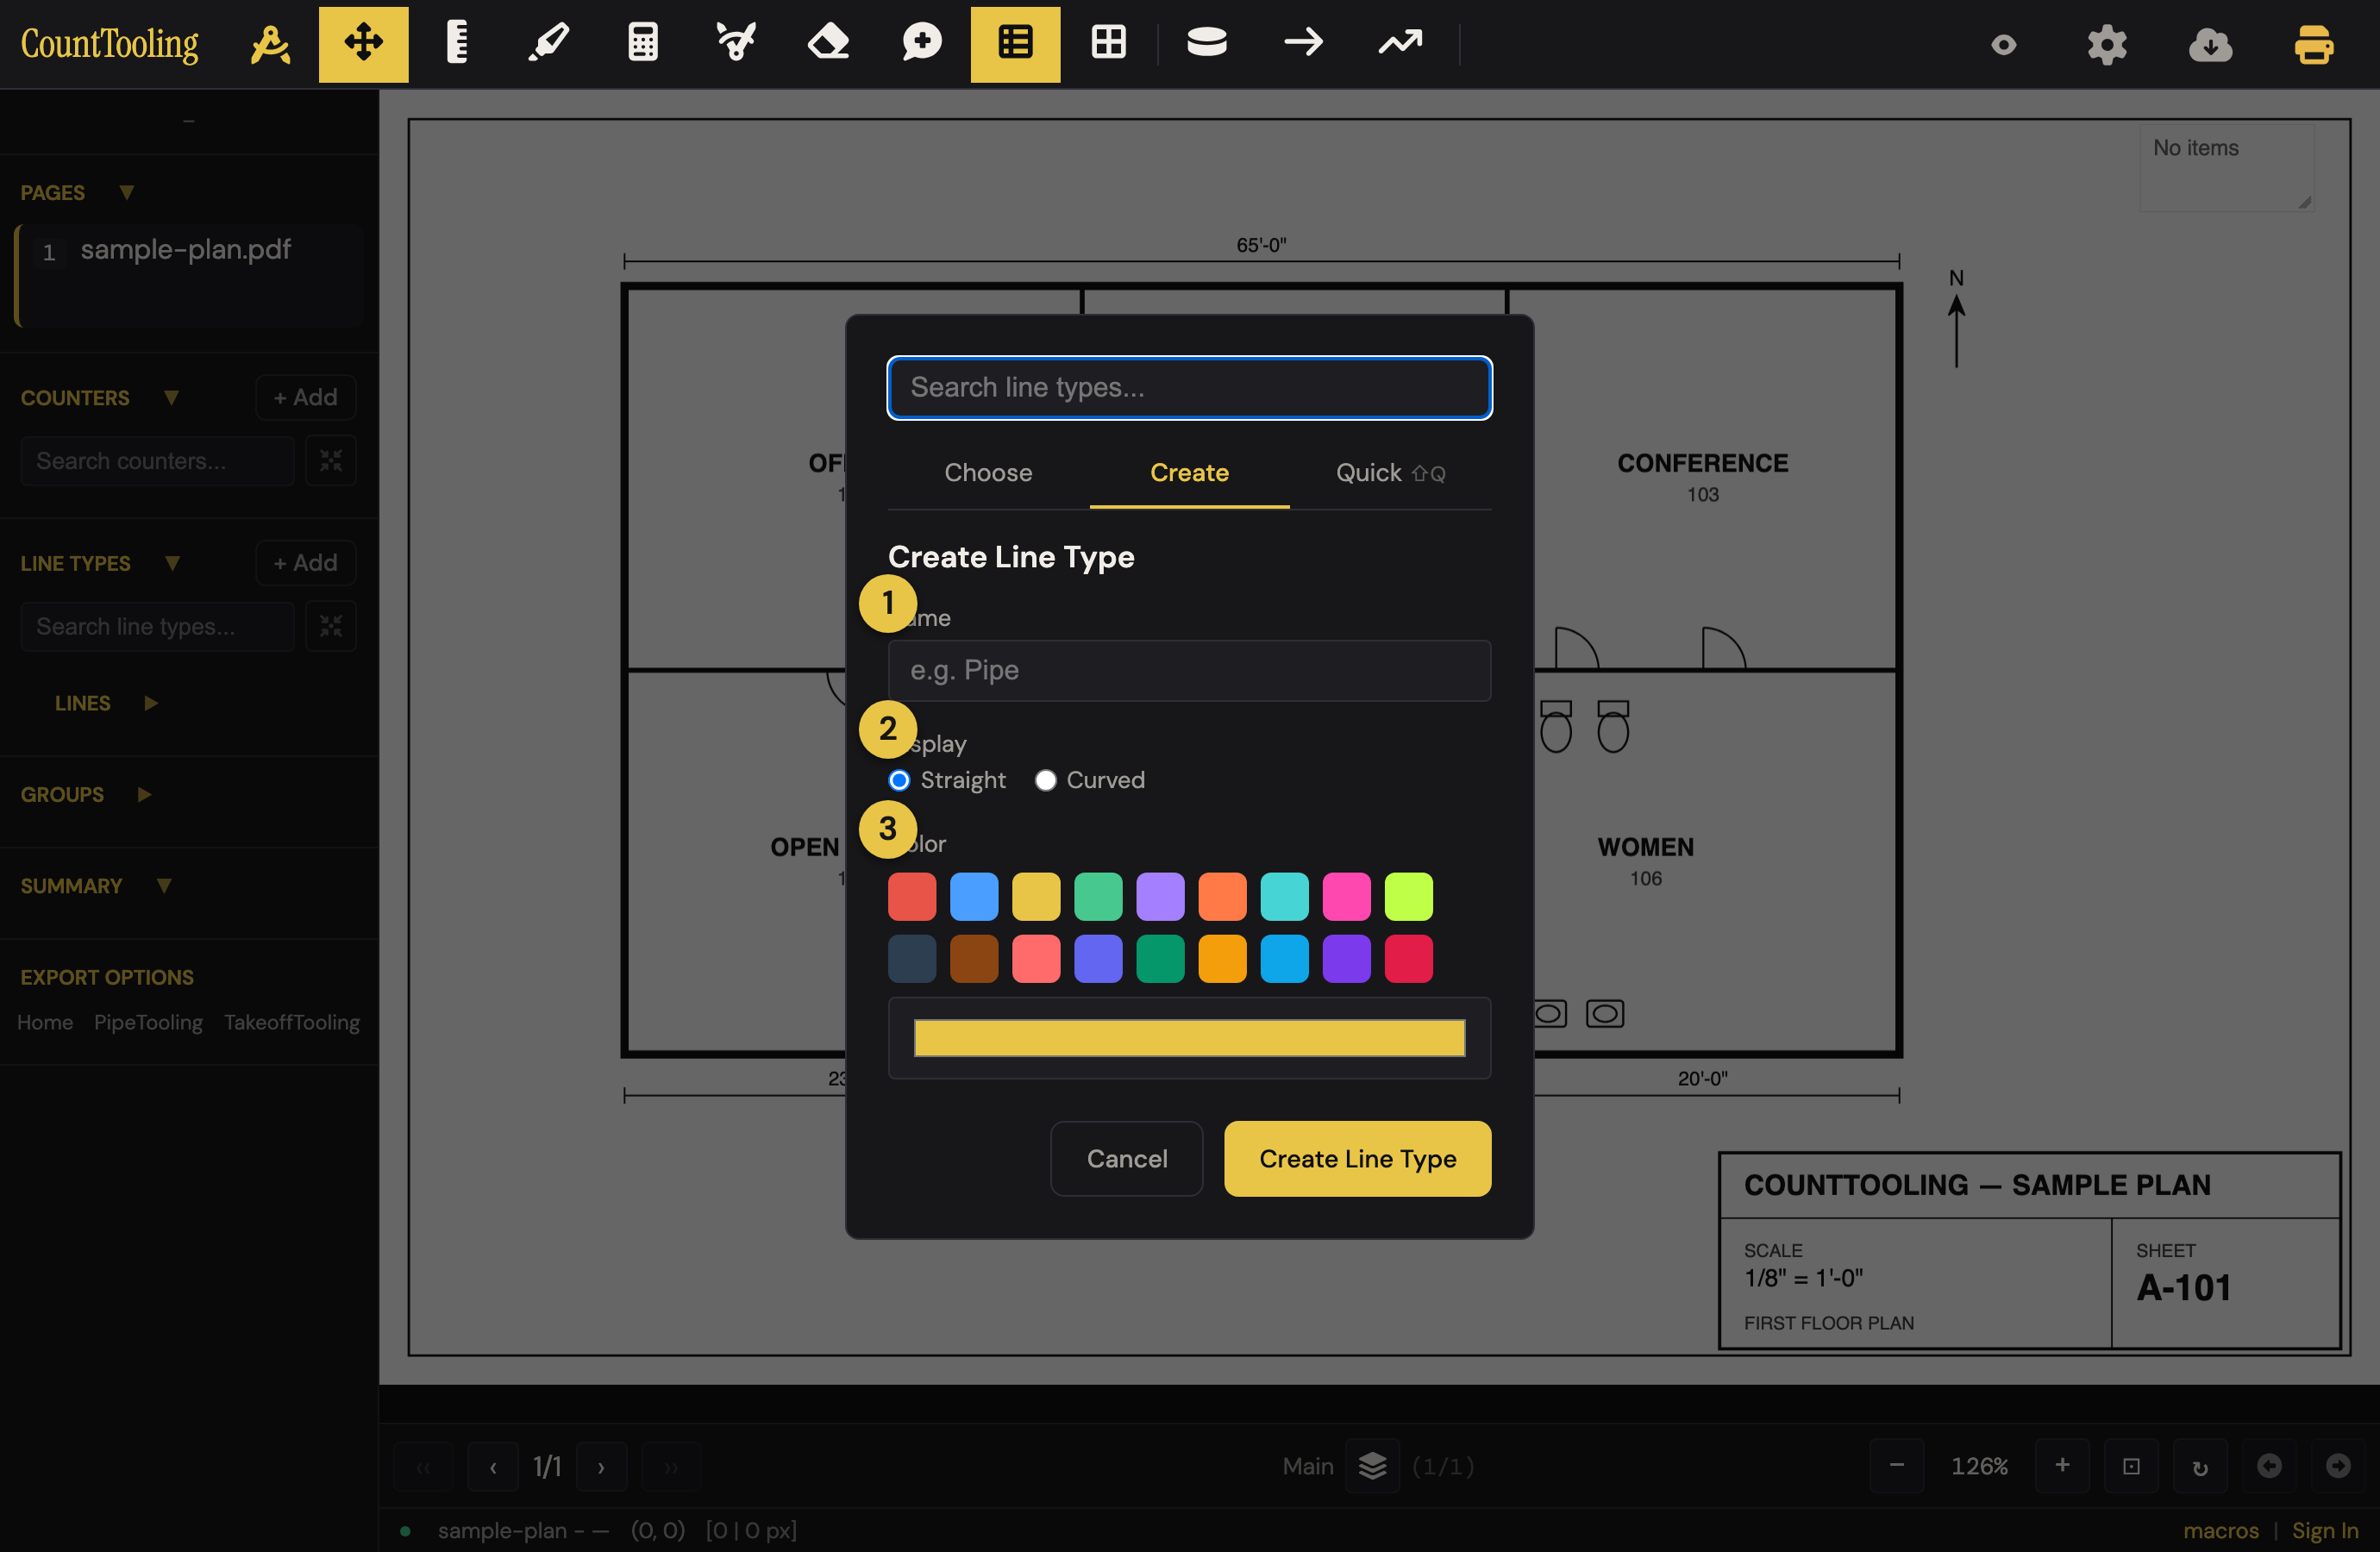
Straight lines
The Line tool is a two-click straight run: click the start, click the end. While you're aiming, the footer bar shows the running length live, so you can trace to a target footage or check a printed dimension before you commit. The length is read off the page scale and added to the total for that line type. Tap the tool again to start a fresh line.
Polylines
For a run that bends, use the Polyline tool: with a line type selected in the sidebar it starts tracing immediately in that type's color: click each vertex along the path and finish to close it out. With no type selected, a dialog asks which type the run belongs to (create one first; the tool won't start without one). The total length is the sum of every segment, so a service line that weaves across the sheet measures correctly in one shape, and the footer shows the running total as you trace, cursor segment included. Backed into a corner? Esc removes the last point (press again to keep unwinding); finish with Enter or double-click.
Arcs and drops
Real runs aren't always flat or straight:
- Arcs: line types can be set to curve, so a sweeping run is measured along its arc, not a straight chord.
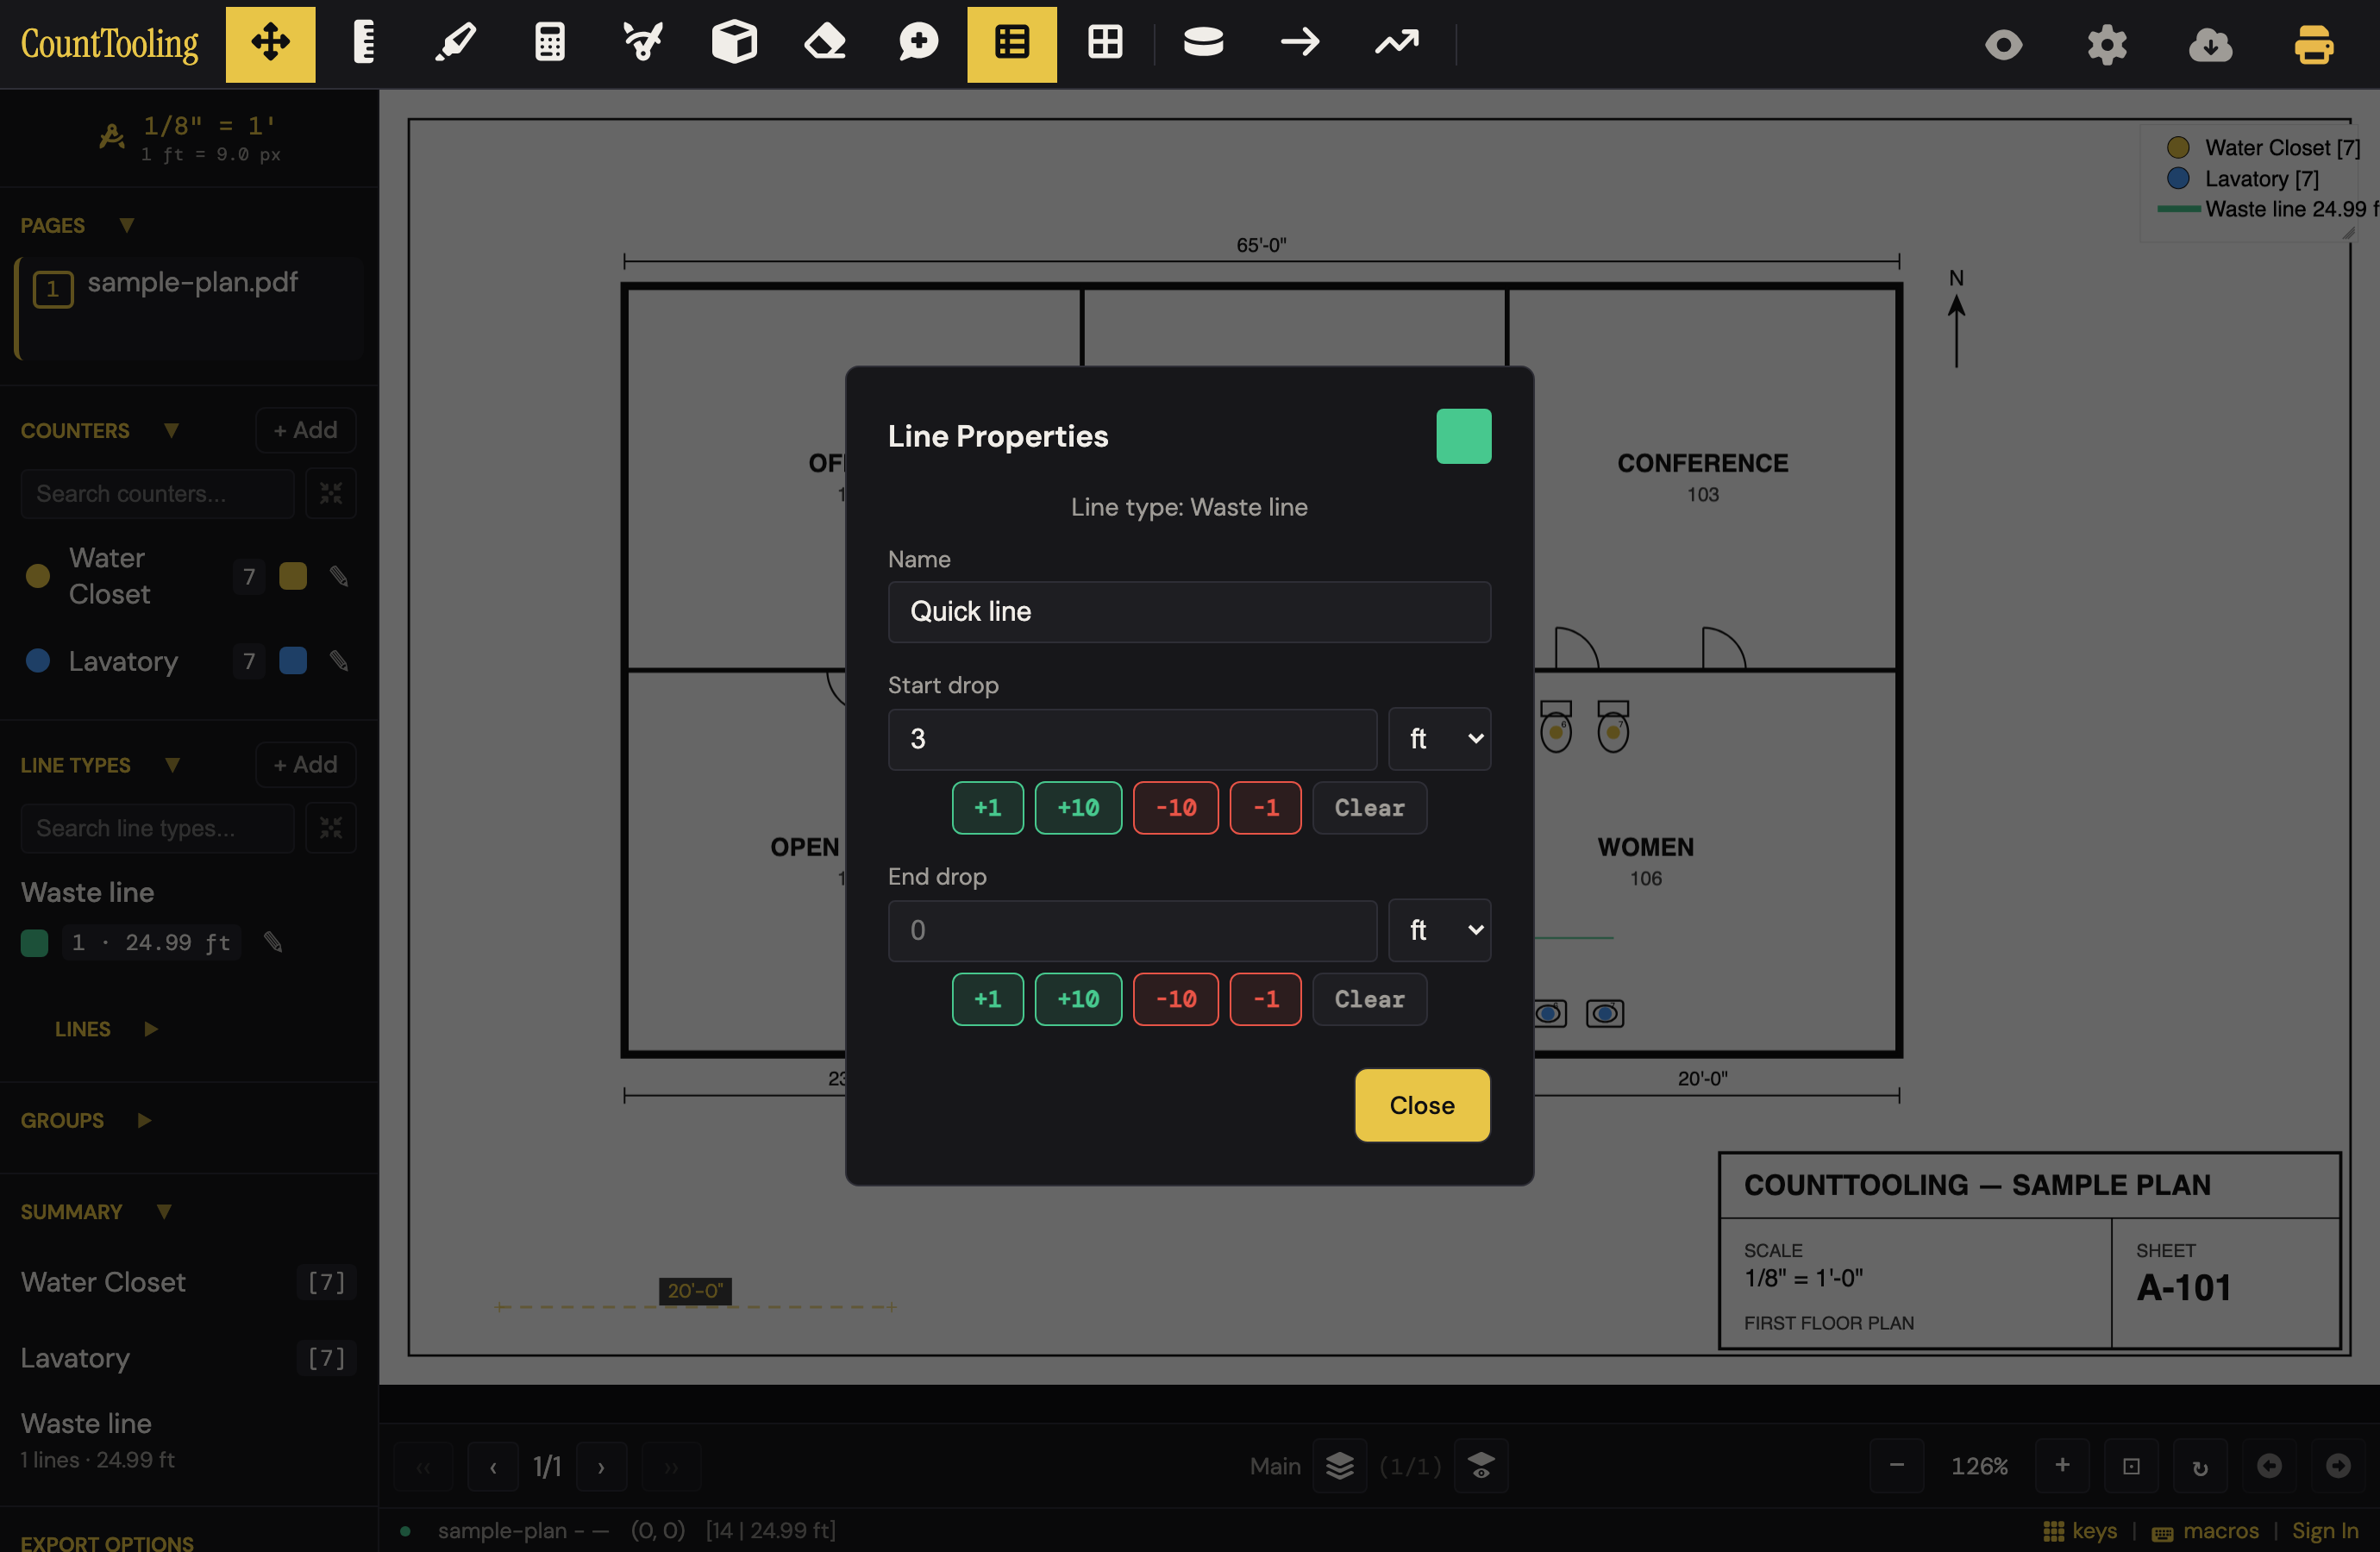
- Drops: give a line a start or end drop to account for vertical rise or fall between floors. The vertical footage is added into the length, so risers and stacks count. Set them in Line Properties (right-click the line), with ±1/±10 buttons for quick entry:
Reading drops back
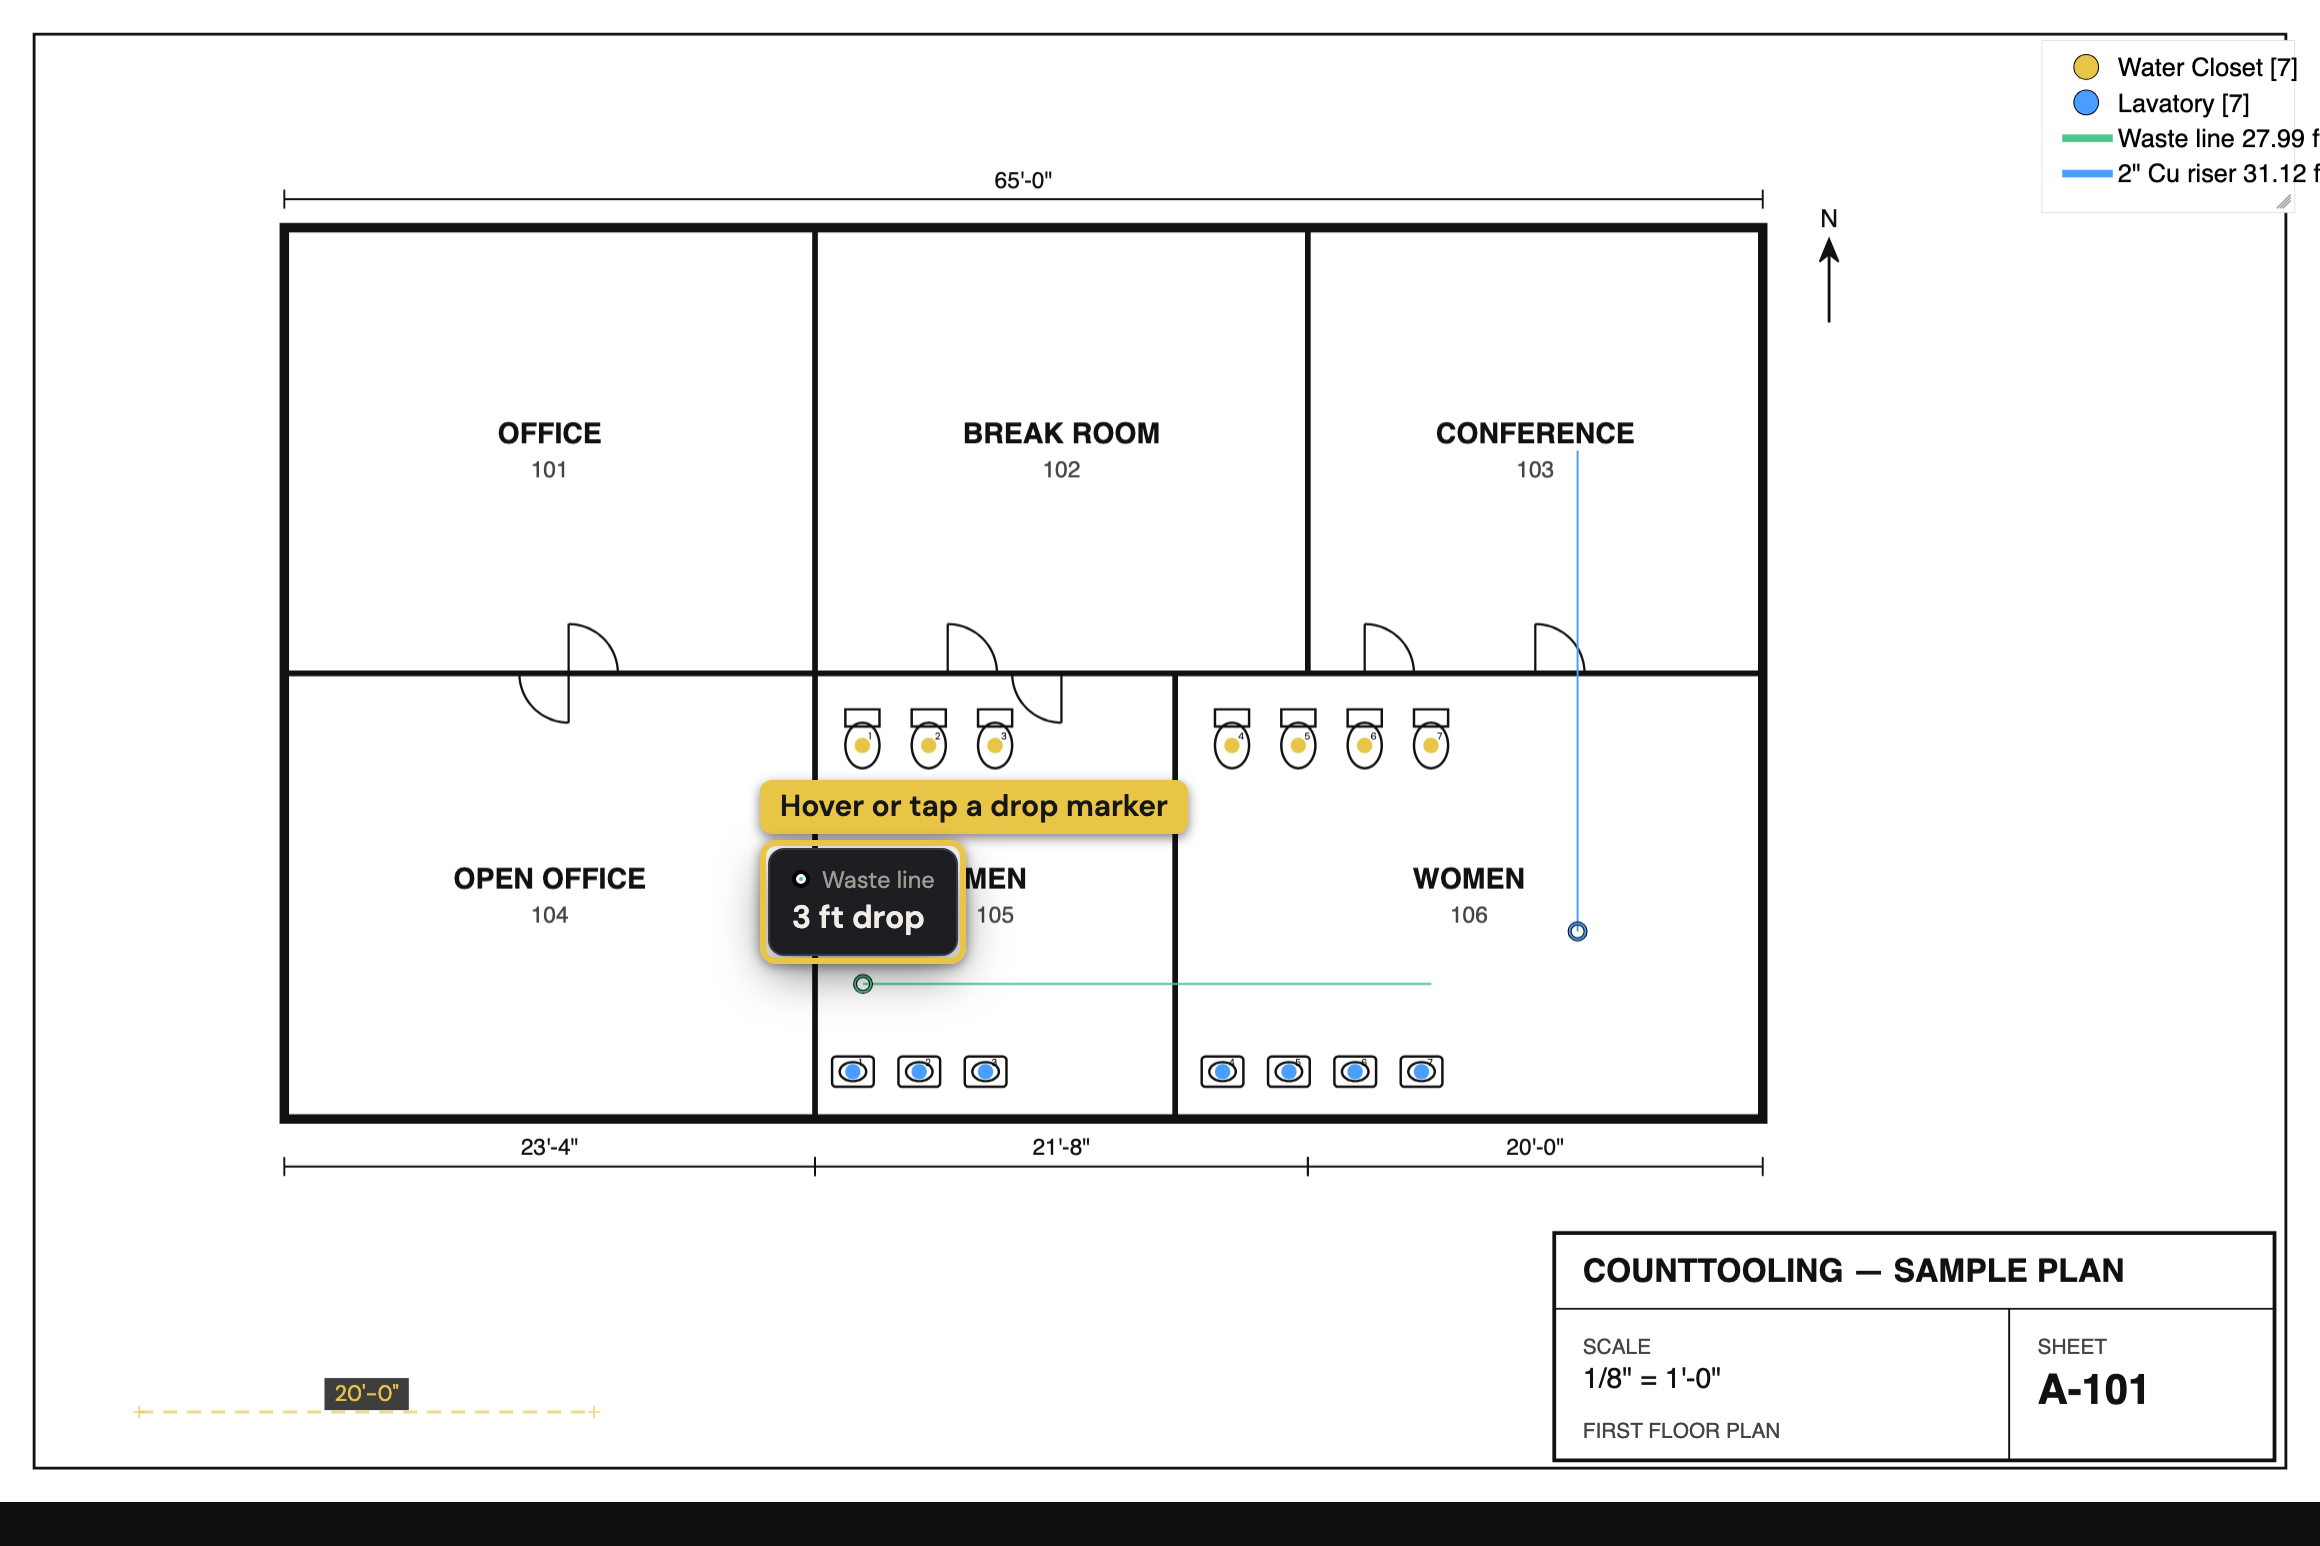
On the sheet, a drop is a small ringed marker at the end of its run, but the ring alone doesn't say how much. Two ways to read the number without opening anything:
- Point at it. With the Move tool, hover over any drop marker, or tap it on a touch screen, and a chip pops up naming the line type and the drop in the unit you entered it: "3 ft drop", "6 in drop". A click pins the chip in place; clicking, scrolling, or pressing any key dismisses it. Where two runs meet end-to-end, the shared point carries its drop once, so the chip always shows one unambiguous value.
- Label them all. The Drop sizes button in the header (next to the Hide-marks eye; in the menu drawer on a phone) writes every drop's size right on the sheet, in the same small white chips the length labels use. It's off by default so a dense plan stays clean, only appears once the project actually has drops, and your choice is remembered on this device.
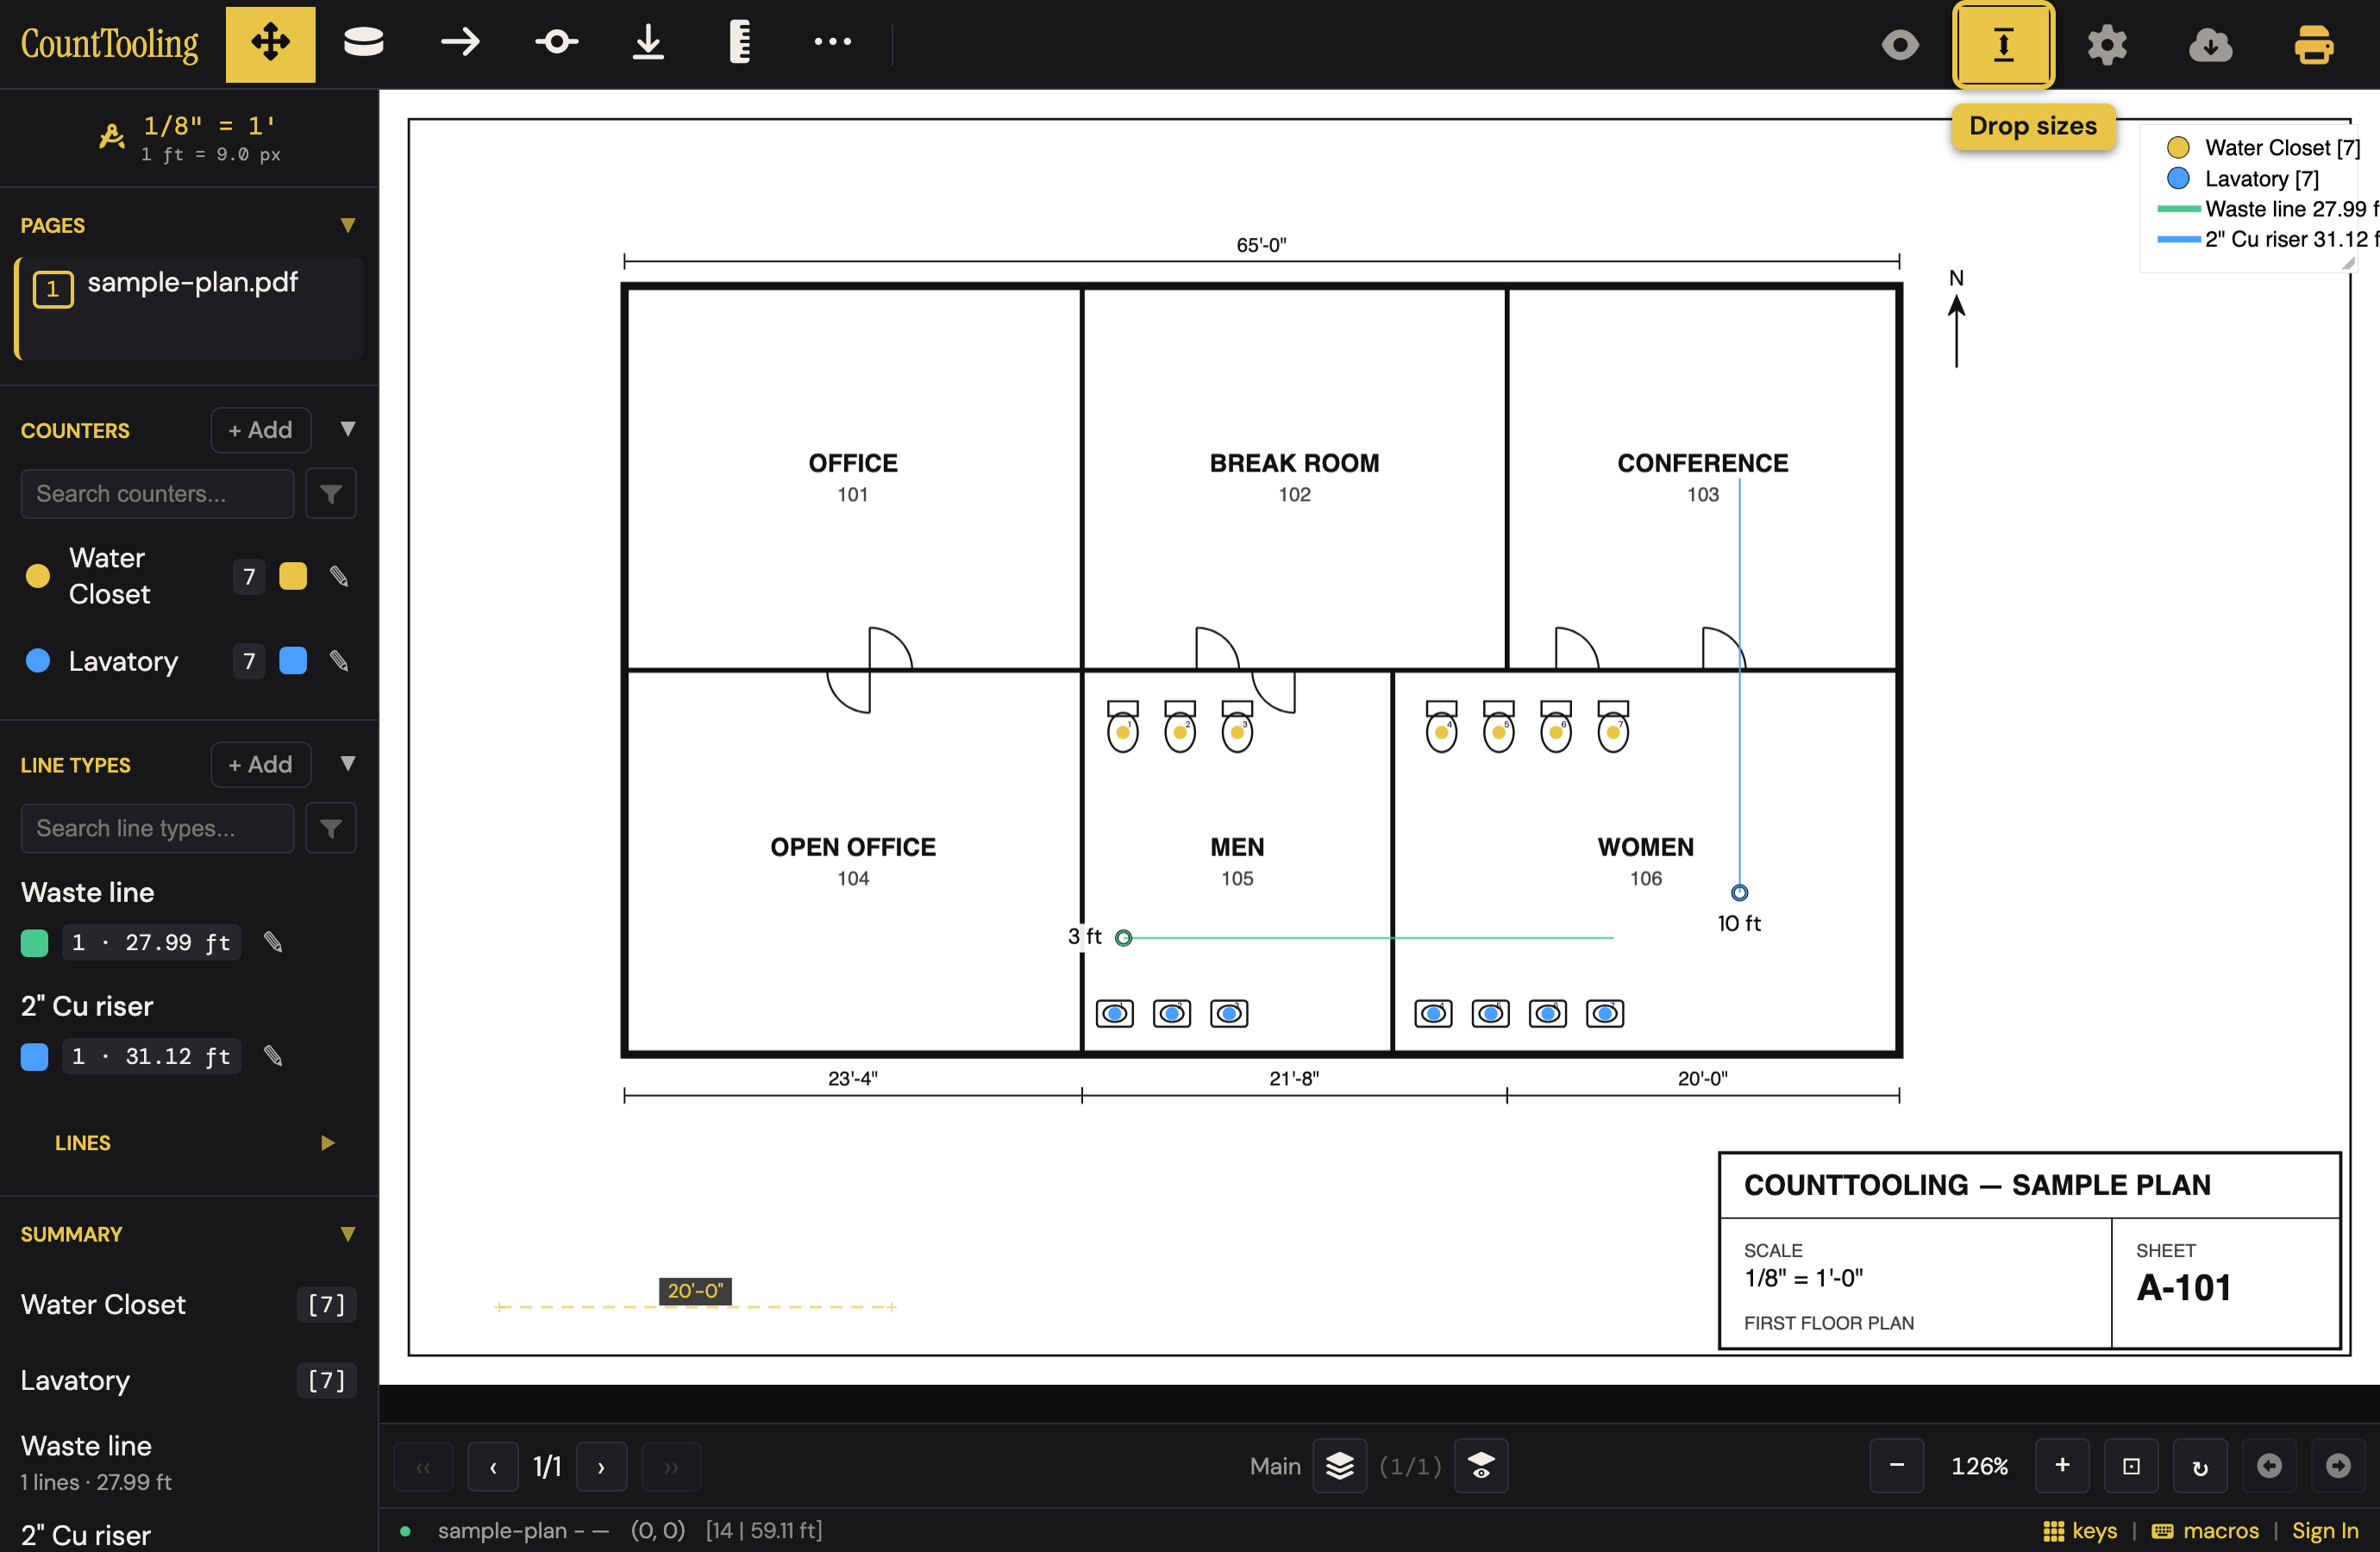
Both are reading aids, not markup: they never ride into exports, prints, or reports, and they work in view-only links too, so a GC or inspector can read your risers without asking.
Length labels on the sheet
The footer and the legend carry the totals, but a reader of the sheet often wants each run's length where the run is. Right-click a line (long-press on a touch screen) and choose Show Length: a small white chip with the run's length in feet and inches sits at its midpoint, turned to read along the line, with a short tick across each end of the run. Hide Length on the same menu takes it off again. Unlike the drop chips above, a length label is markup: it prints and exports with the sheet. Its size, and whether it turns with the line, are set once for every label in Line Type Settings (right-click the Line tool): Label size and Orient length with line direction.
When a label lands on the plan's own dimension text, or on a neighbouring run's label, move it. Right-click the line and choose Move label: the label follows the pointer along its line, so slide it to a clear stretch and click to drop it (on a touch screen, drag it and lift). It never leaves its line, so it still reads as that run's dimension; on a polyline it can cross onto another leg and turns to follow it. Esc or a right-click puts it back where it was, and Reset label on the menu sends a moved label home to the midpoint. A run shorter than its own label stays covered wherever the label sits; hide that one's length instead.
Keep lines clean
- Snap to 45° angles (press
J) locks every segment to horizontal, vertical, or a 45° diagonal (the angles real pipe and conduit runs actually take), so your takeoff looks as tidy as the plan. - Turn on the grid with snapping when you want lines to follow a regular module.
Quick one-off distances
Just need to check a dimension without adding it to a takeoff? The Measure tool gives a distance in two clicks; it appears in the footer bar and stays put while you keep working on that sheet. If those two points fall inside a scale zone, it uses that zone's scale automatically.
With counts and runs both on the plan, you're ready to review and export.