Doing an HVAC takeoff
HVAC estimating starts from a number most takeoff tools can't produce, how much air each room needs, and ends on one they leave to a spreadsheet, pounds of duct. CountTooling measures the first straight off the plan, carries it through the devices and the duct, and hands you the second.
New here? Open the app with nothing loaded and click hvac under take the five-minute tour. It walks a design-build duct takeoff on the sample plan (set and prove the scale, box a room the plan already names, give diffusers a CFM, name the system, let the app size the main at S, hang the strays, read the pounds, sign off and hand it to the bid). It circles where to click and shades where to drag on the sheet, checks each step against what you actually did, and Show me where points at anything you cannot find. Open it directly: the HVAC tour. For the why as well as the how, the HVAC course is nine chapters on the same restaurant's mechanical set: which room breathes hardest, why the main shrinks down the hall, whether the wrapped duct fits the plenum and the fan can push to the far diffuser, and the duct that must never be galvanized (Learn CountTooling by doing lists them).
Room volumes first
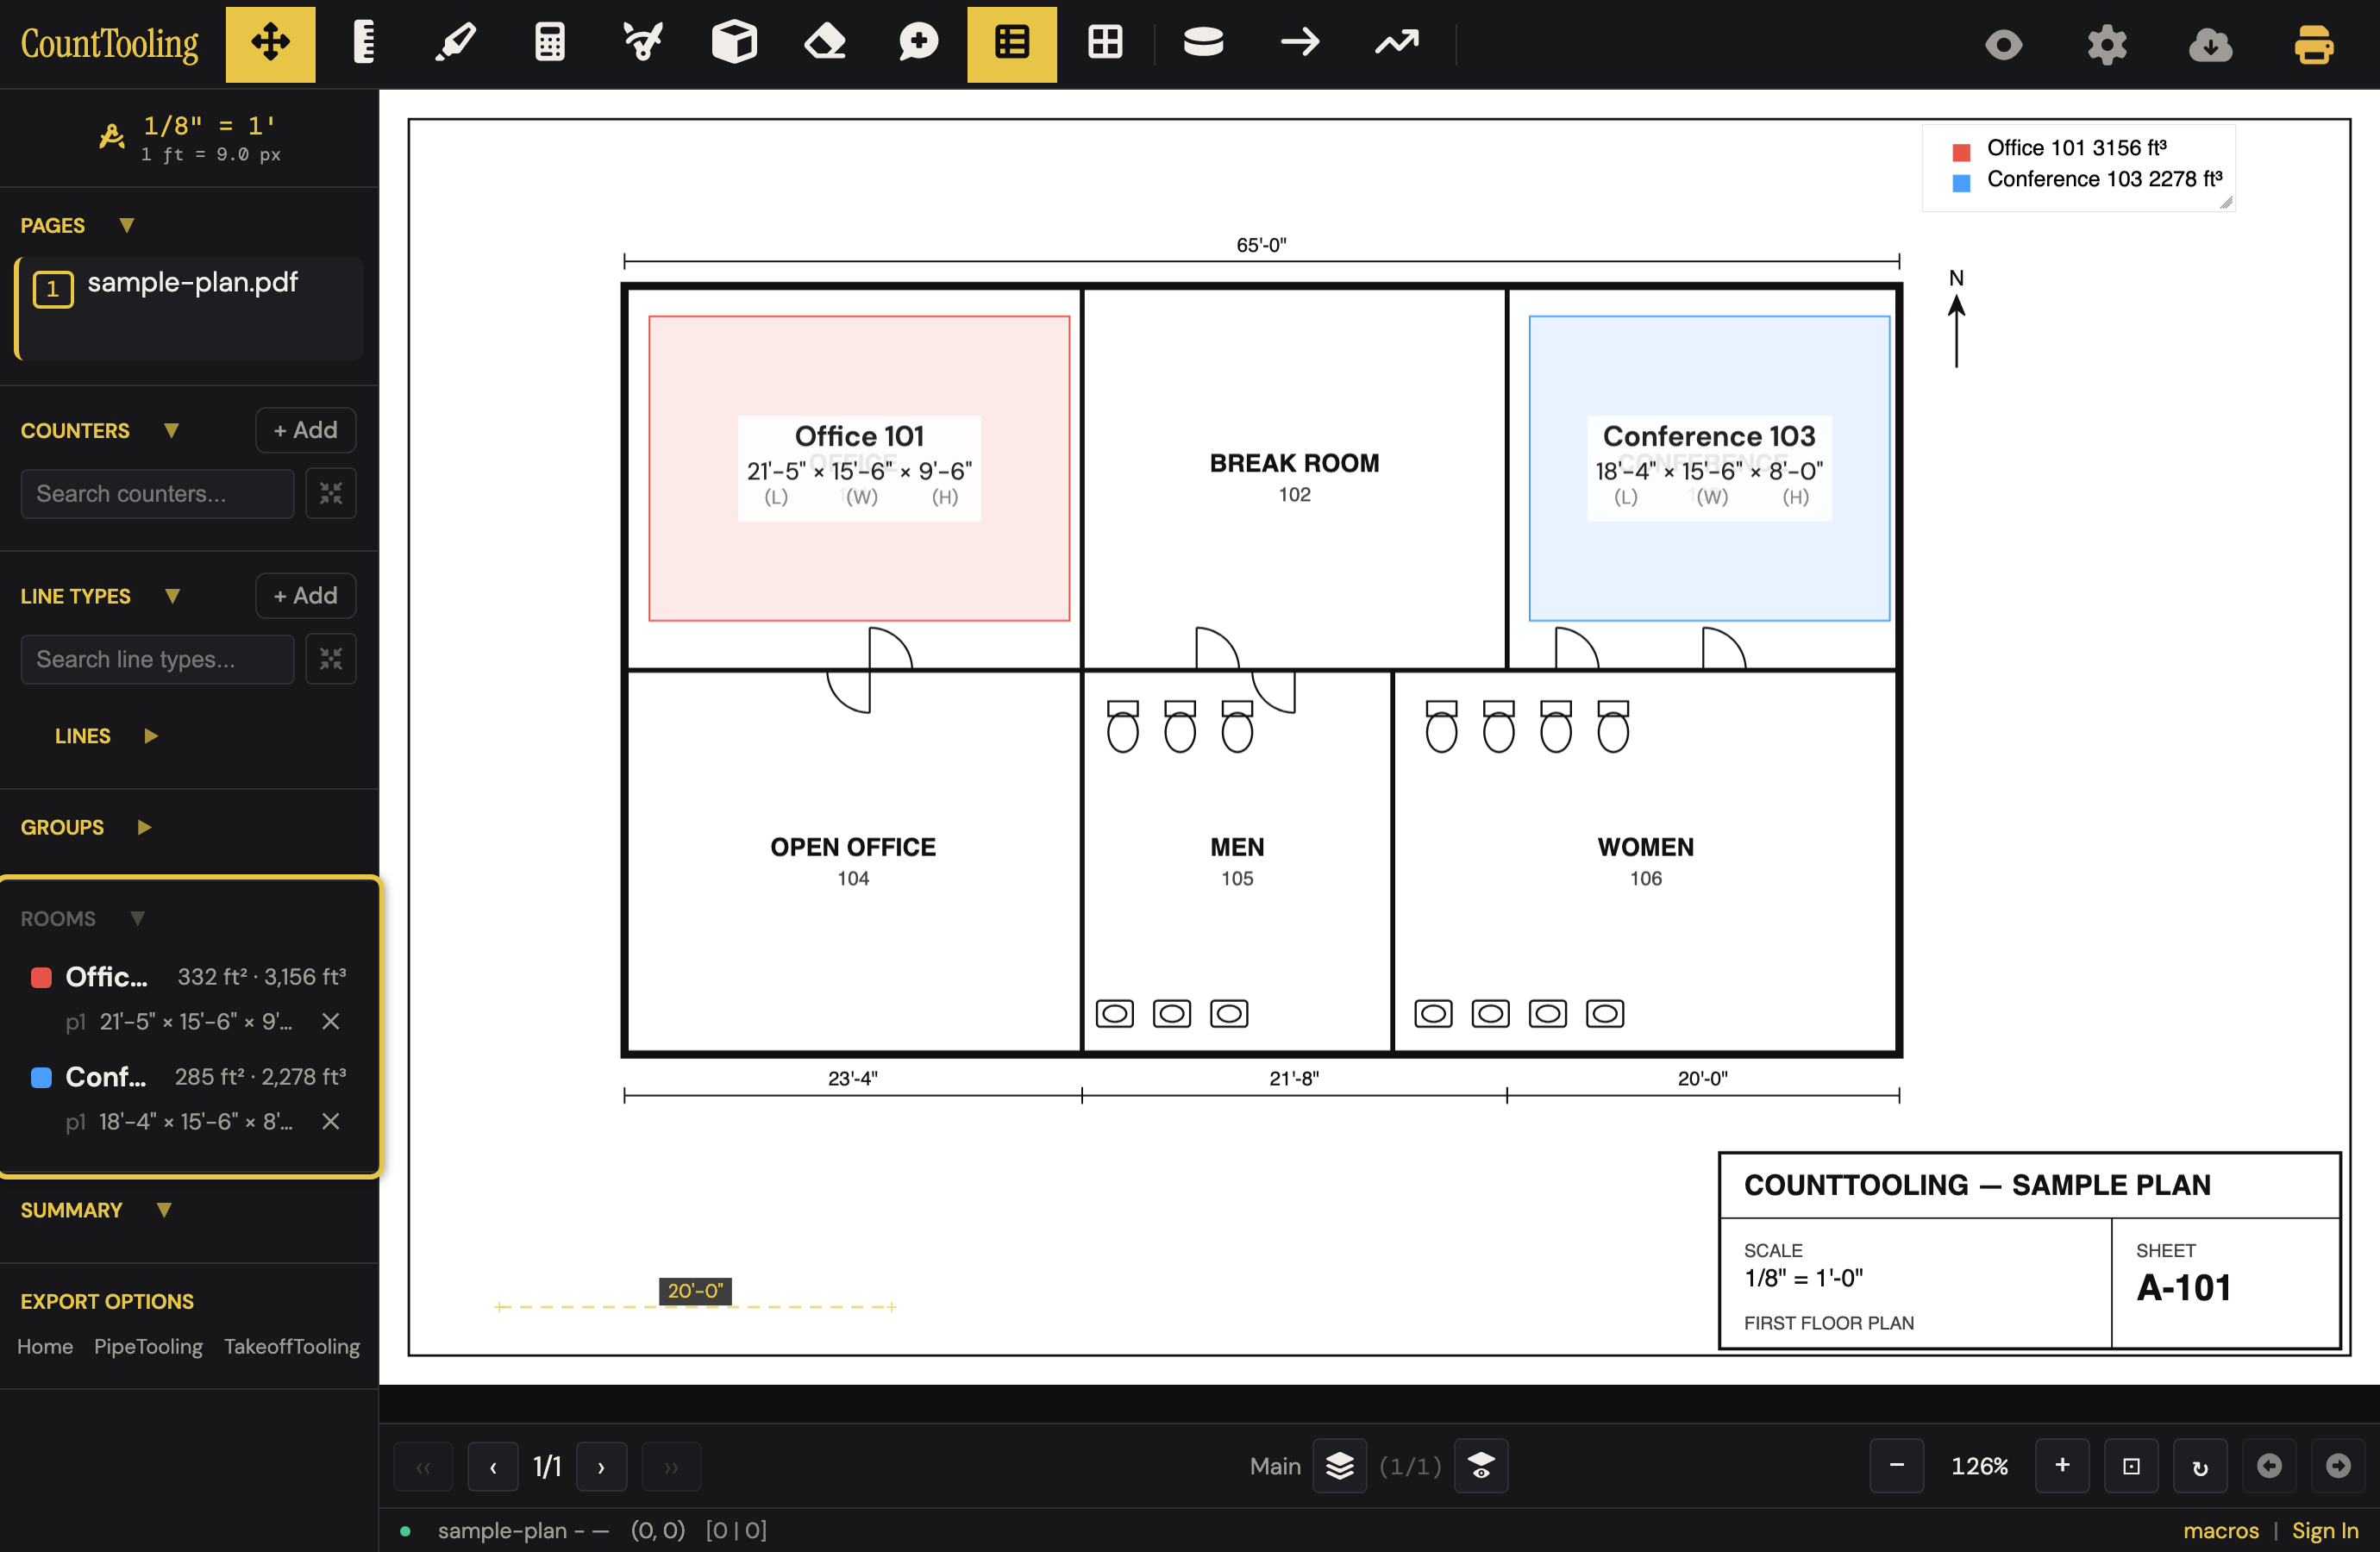
The Room Sizer tool turns rooms into floor areas (ft²) and air volumes (ft³): the inputs for ventilation rates, air changes per hour, and rough equipment sizing.
Set the page scale first (room sizes come from the drawing, so the tool won't start without one), pick the Room Sizer (or press V), and drag a box across a room (or click two opposite corners); a live readout shows the length × width while you move. When the second corner lands, the Room Size dialog opens:
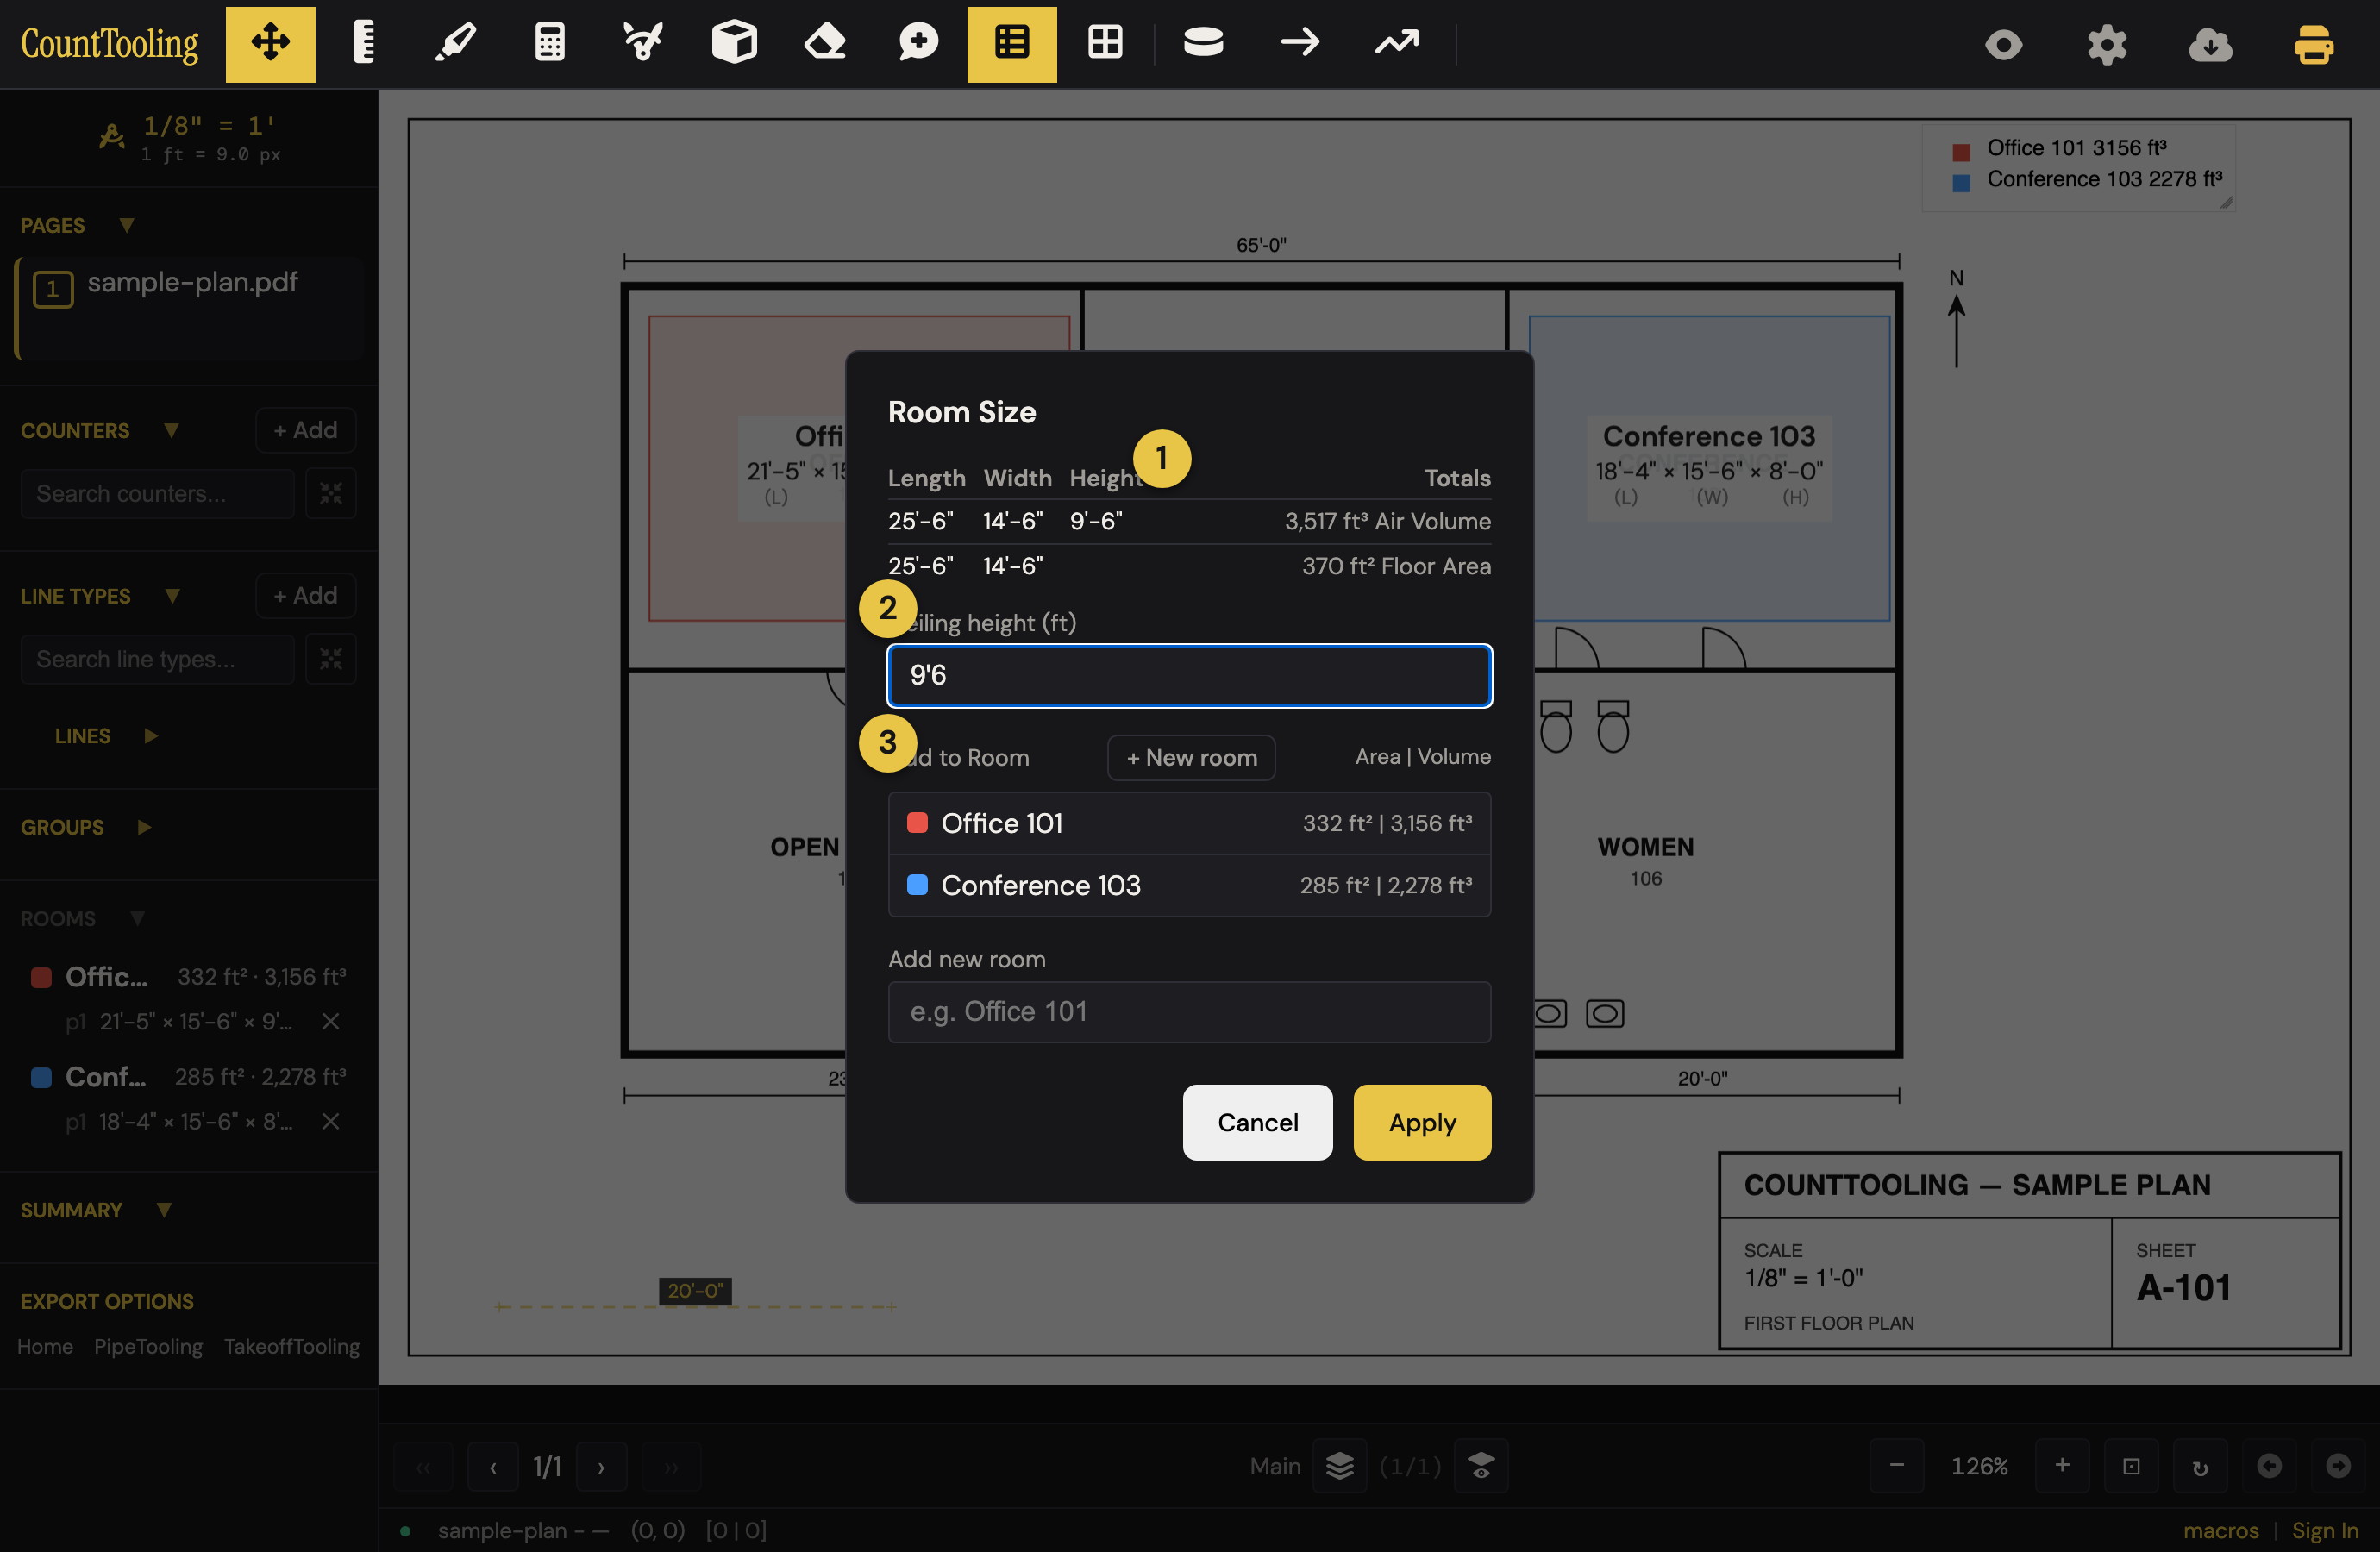
Everything the dialog does is built for doing a whole floor fast:
- The totals table at the top shows Length and Width read off the plan, the floor area immediately, and the air volume the moment a height is entered; you see the numbers before you commit.
- Ceiling height takes feet however you'd write them (
9.5and9'6both parse), and heights you've used recently appear as one-tap chips, because most rooms on a floor share a few heights. - Add to Room assigns the box to a room (each room in the list shows its running area and volume so far), or + New room creates one on the spot, with its own color.
After Apply, the tool stays armed with your last height and room preselected, so the next room is literally two clicks. For an L-shaped or irregular room, draw it as two or more boxes assigned to the same room; the room's totals are the sum of its boxes. Boxes render in their room's color with name and L×W×H labels, are edited from their right-click menu, and respect scale zones.
A room whose name came off the plan is labelled differently on the sheet: instead of a Name + L×W×H block on every box (which covered the plan's own room names on multi-box rooms), it gets one small totals tag (1,237 ft³ · 137 CFM · ⚠) on its largest box, placed in a corner or along an edge where the printed text isn't. Rooms you named yourself keep the full label.
Per-room area and volume land in the Rooms sidebar, on the sheet as labels, in the legend, and in a Room Volumes table in the report and email summary. The full walkthrough: Measuring room volumes.
Count the air devices
Make a counter per device (diffusers, grilles, exhaust fans, thermostats, equipment), each with its own icon and color. On an HVAC project the Create tab's air & mounting fields are already unfolded: type a CFM and the counter takes the supply diffuser symbol and every mark it places carries that air. The icon picker's HVAC group ships the M-sheet symbols (supply diffuser, return grille, RTU, VAV box, fire/smoke damper), and you can still upload your own to match your schedule. Click each one; the tally rolls up across every sheet, and the room's row in the sidebar reads the air it needs against the air its devices serve.
A group with an equipment tag and a capacity is a system: make RTU-1 at 2,000 CFM, select it, and the duct you trace next belongs to it. The group's row reads designed air against capacity.
Trace the duct, and let it size itself
Duct is not a line type. Pick the Duct tool (press U), choose the airside and a starting size, and click along the main like a polyline. The chip under the cursor reads the air still to serve downstream and the size that carries it at your friction rate; press S and tap the suggestion to step the run down, and the transition counts itself. On an engineered sheet the tool reads the printed size callouts instead, and the engineer's number wins over the rule of thumb.
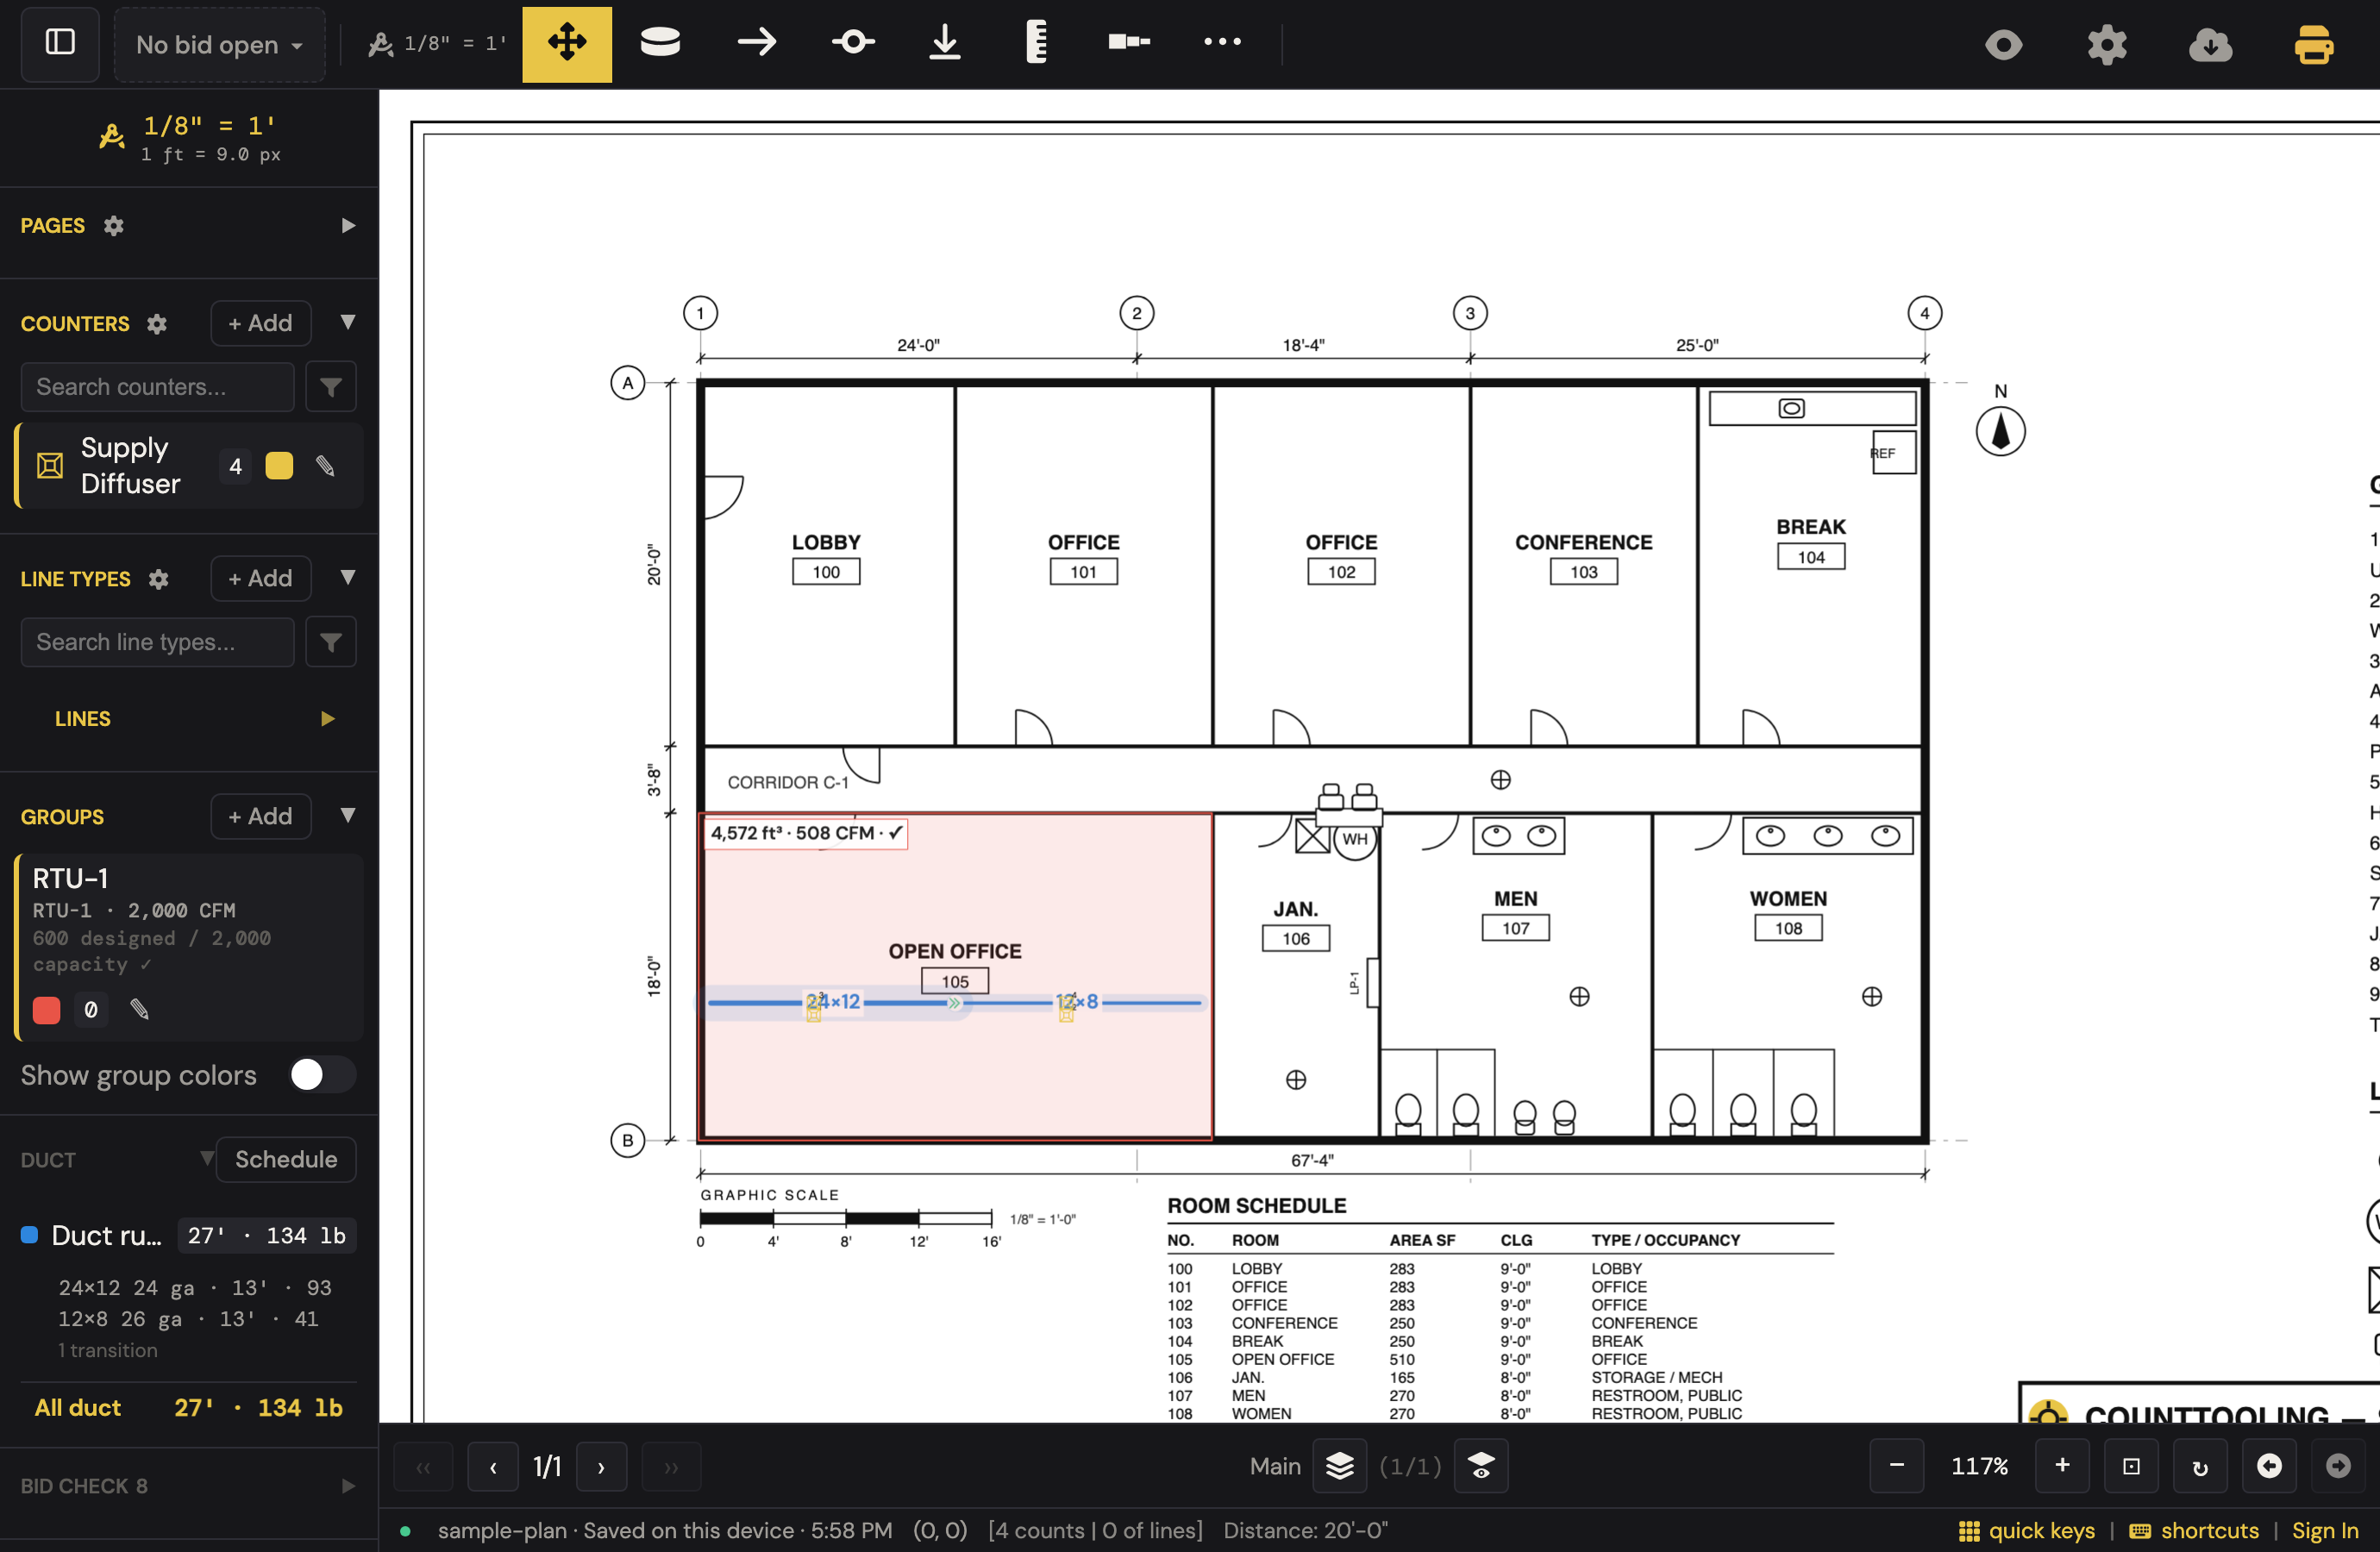
- Devices hang off runs. A diffuser within 8 in of a run draws a dashed leader to it and its air is served. One that draws nothing is a stray: right-click it and choose Attach to nearest run.
- Fittings count themselves. Elbows from the bends, transitions from the size steps, taps from the attached devices. Nothing to place.
- Deck height (in the Duct create dialog, the Room Size dialog, or the Duct Schedule) arms the vertical riser on runs that start at equipment.
Piping, refrigerant lines and condensate are ordinary runs: trace them with Line and Polyline , with drops for risers. Details drawn at another scale? Wrap them in a scale zone . Typical floors? One multiply zone counts them all.
Pounds, not feet
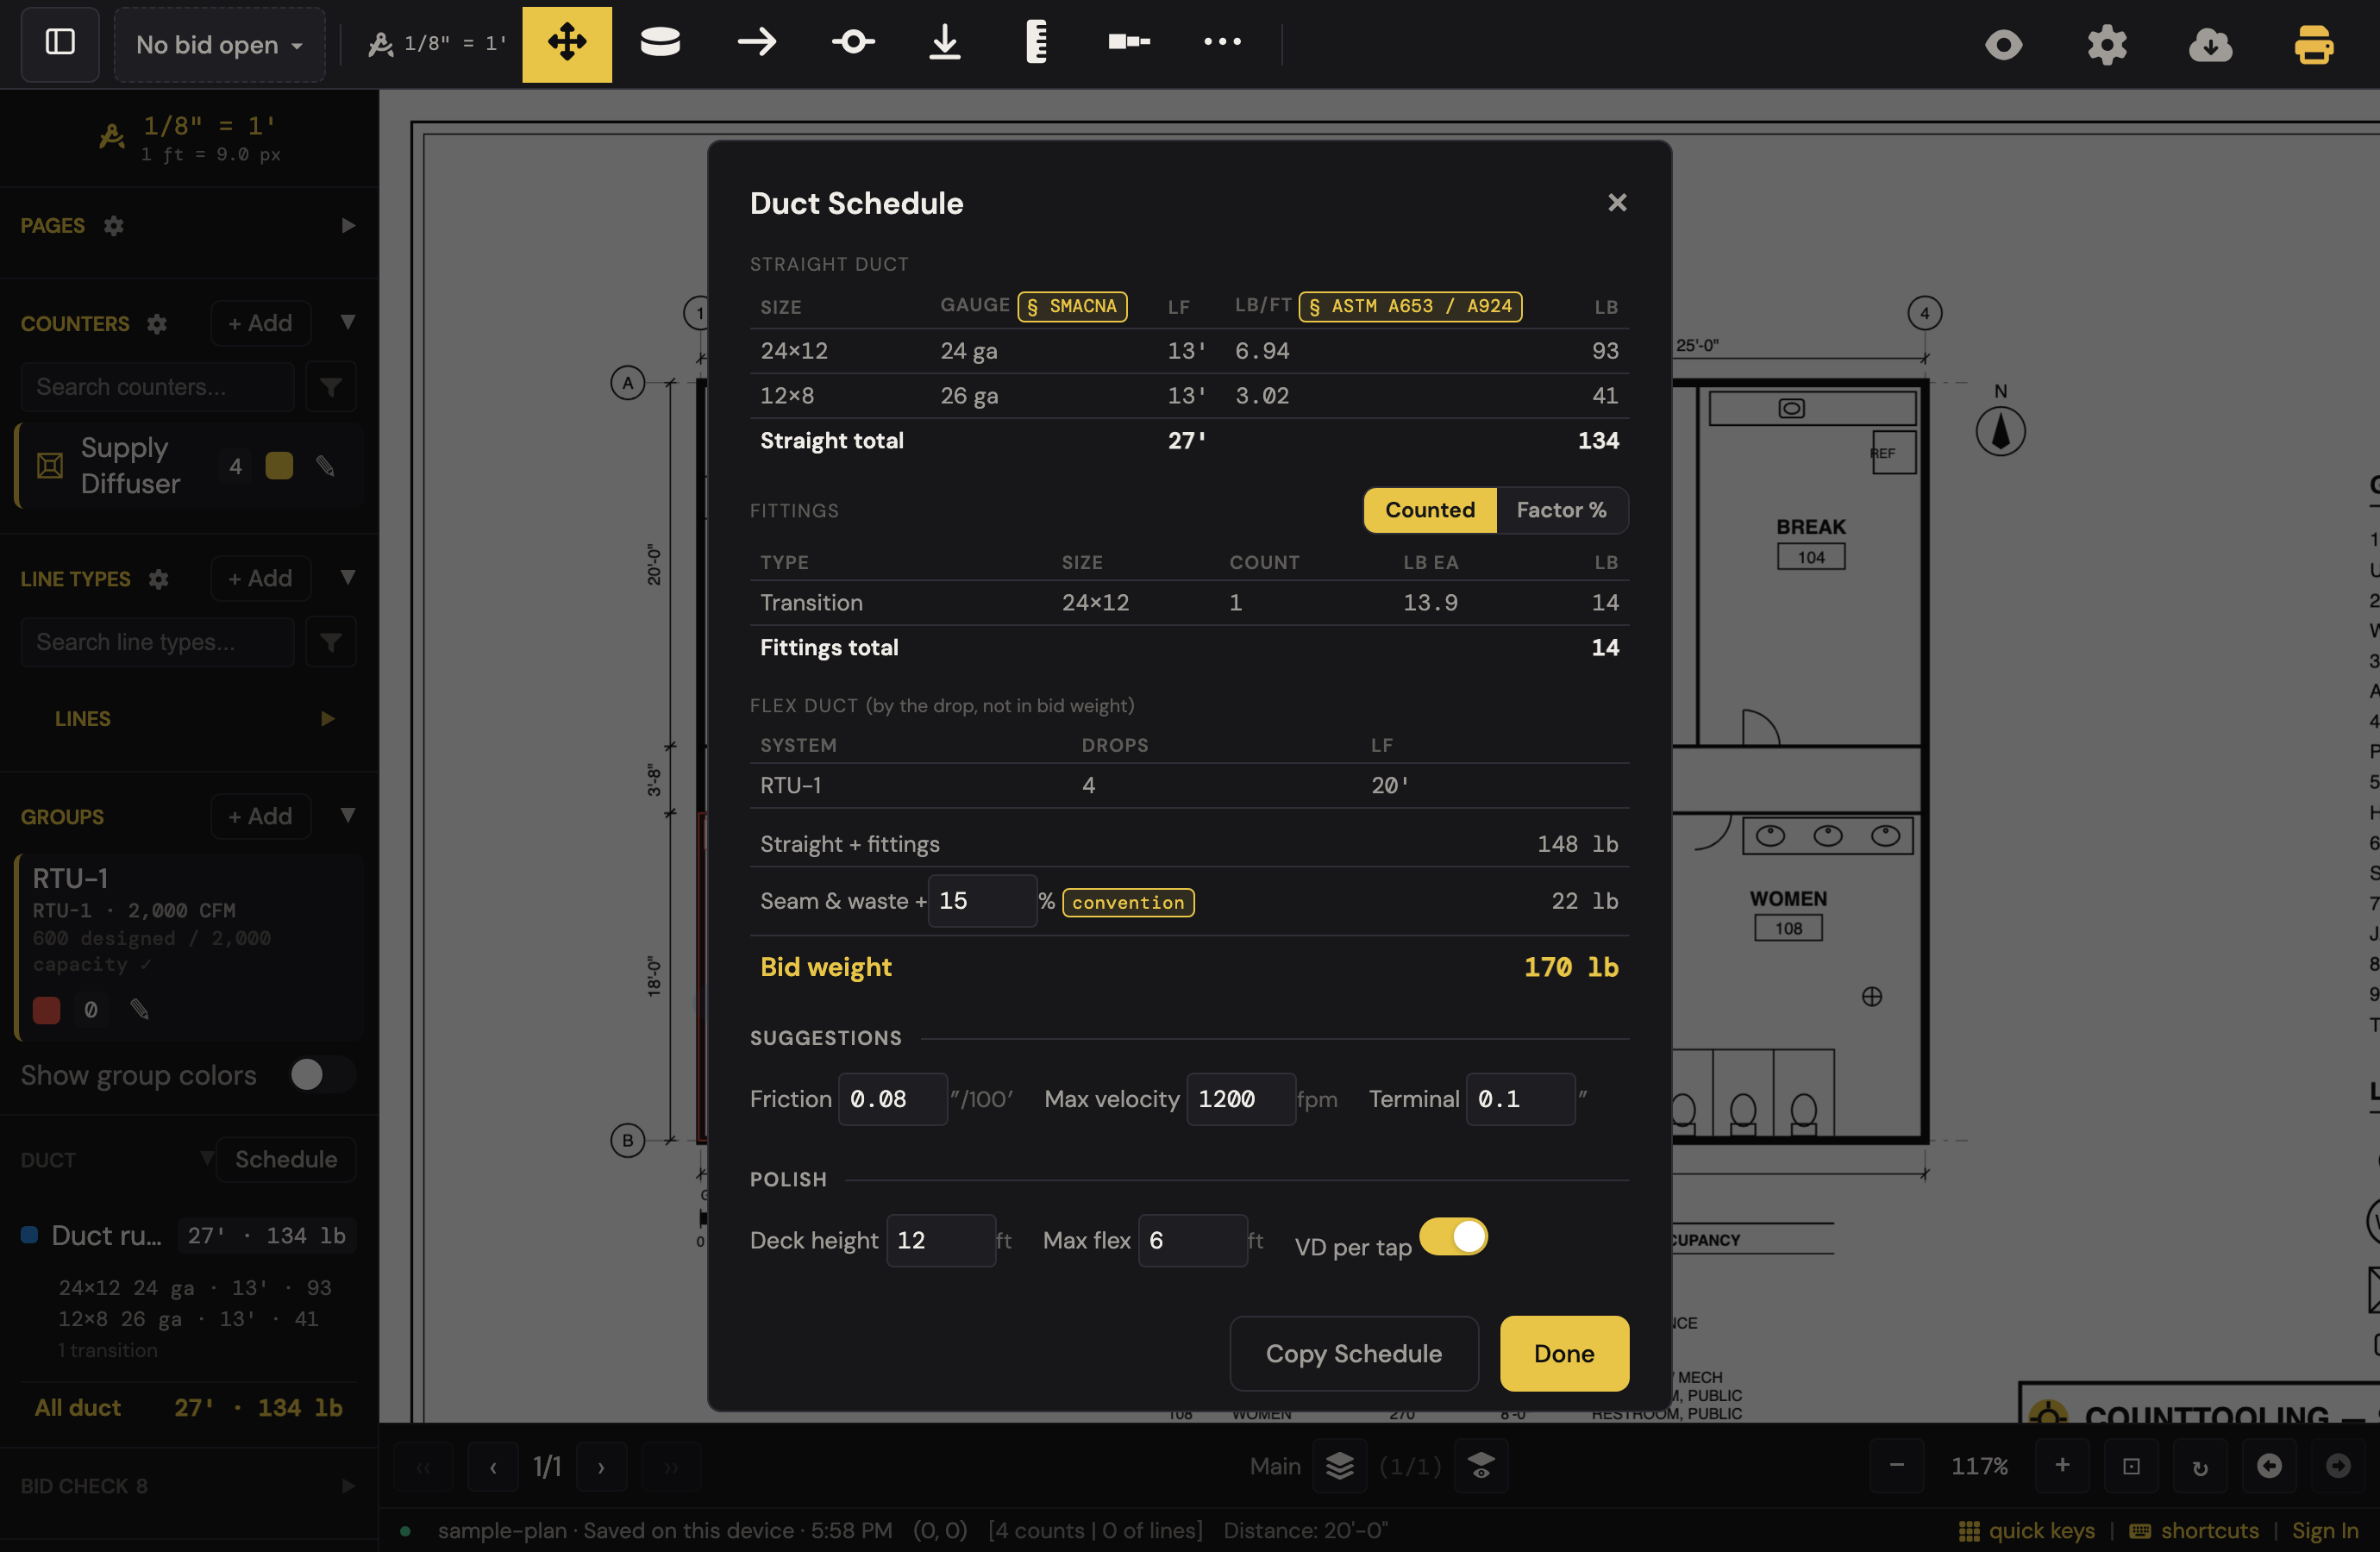
Under DUCT in the sidebar, Schedule opens the Duct Schedule: straight duct by size with its gauge and pounds per foot (each column's § chip names the table it came from and opens it in the public rulebook), the fittings you did not have to count, flex by the drop, seam & waste on its own line, and the number a sheet-metal bid is built on, Bid weight. Copy Schedule puts the table on the clipboard. The whole method, including the design-build suggestions and the static-pressure path, is in Duct takeoff by the pound.
Bid Check before you send it
A kitchen hood's grease duct is not galvanized and the gauge table must not size it: set Material in the Duct dialog (or on the run's right-click menu) to welded black steel or welded stainless, and the run prices on its own row at the fixed gauge the code sets (16 or 18) and that metal's sheet weight (the grease-duct rule). Under the schedule a Grease duct block then prices what is not metal by the pound, outside the bid weight: cleanouts by the piece, one at each change of direction and one per 12 ft of horizontal run, and the listed wrap by the square foot of duct surface. A fire damper at a rated-wall penetration is a count: the Fire Damper type on the Quick tab.
The Bid Check section judges what it can on its own (every room served, systems within capacity, flex drops within the max, the scale set on every duct sheet) and lists the calls only you can make, such as Fits the roof, as ticks saved with the bid. Hand off with a row still open and the gate asks first; Export anyway remembers your answer until something changes.
Deliver the numbers
- The legend on an HVAC project draws as a compact ruled block, the way an M-sheet's own legend does: duct by size, each air device with its neck and CFM, the room's air line. Show Report breaks everything down by type: counts, lengths, room volumes, and the duct block.
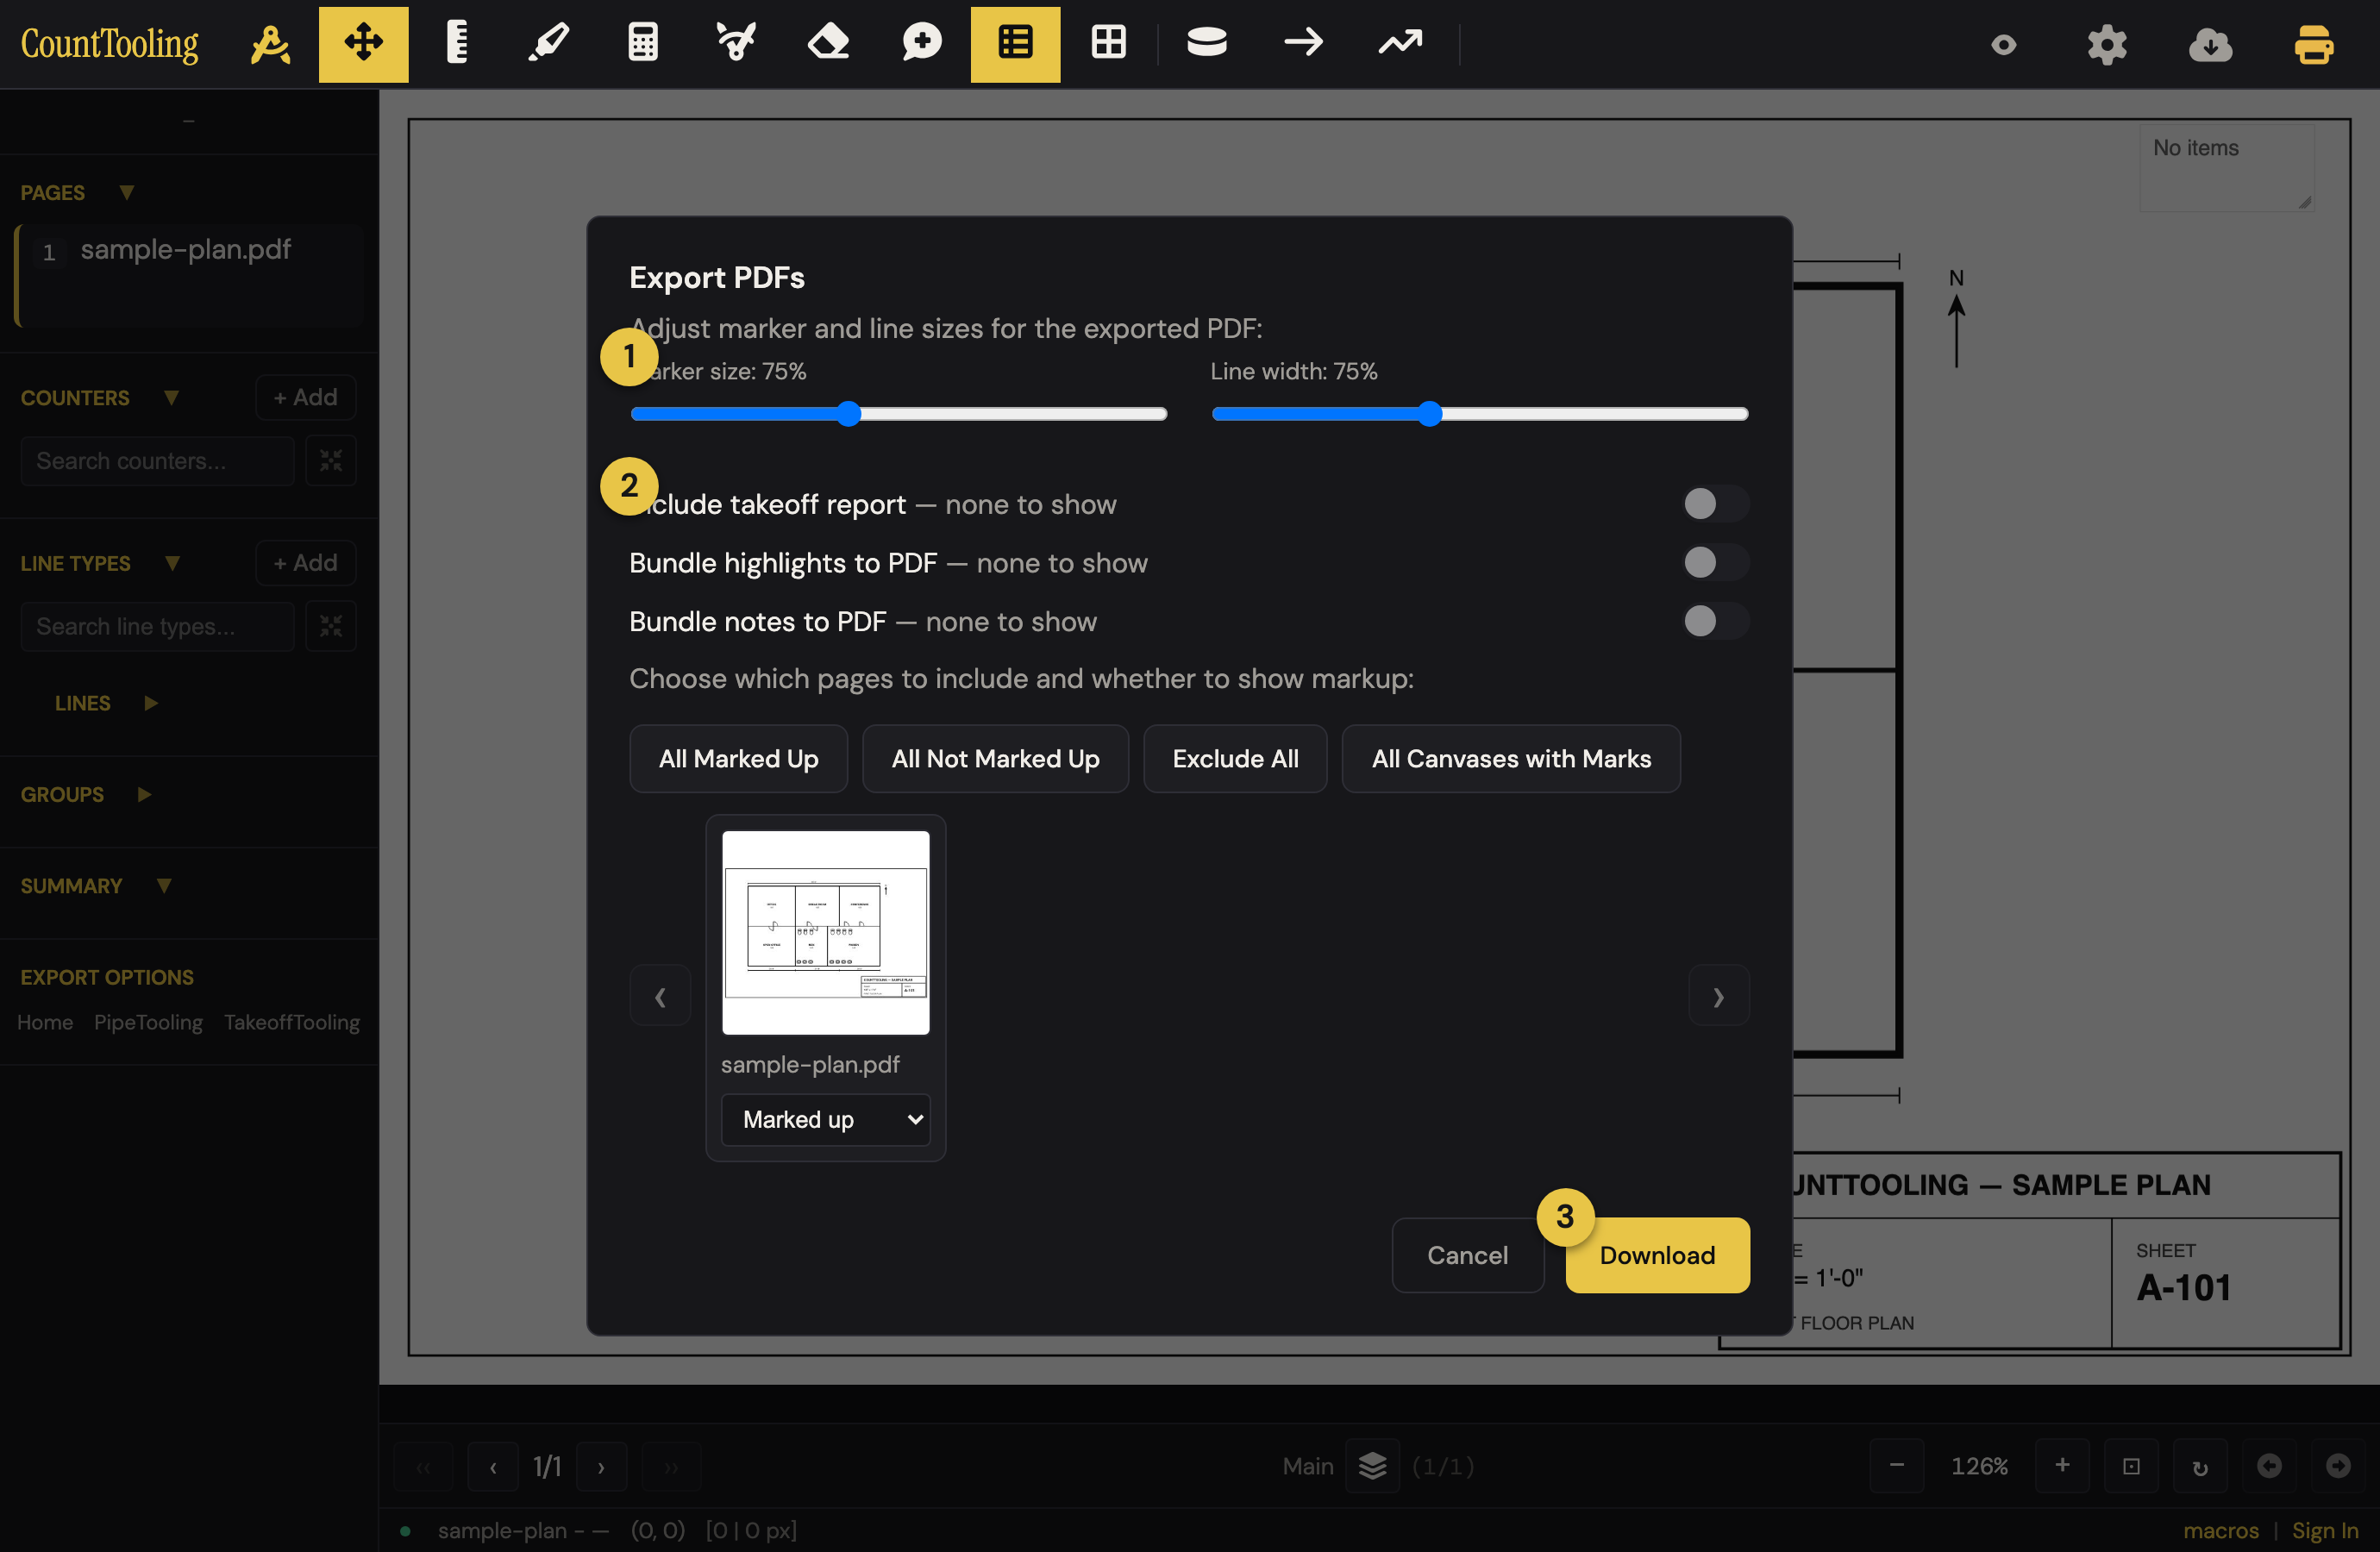
- Export PDFs hands over a marked-up plan with the report bundled in.
- Copy to /Tooling hands the takeoff to the bid, with the Duct block and its pounds at the end; its first line names exactly what was copied.
- Copy Summary (Email/Text) drops the numbers into an email; totals are always decimal feet, so they line up across mixed sheets.
For the general workflow end to end, see How to do a takeoff from a PDF.